Find Leak in One Handle Kitchen Sink Faucet: Your Comprehensive Guide to Diagnosis and Repair
Is your one-handle kitchen sink faucet dripping, spraying, or causing water damage? You’re not alone. A leaky faucet is a common household problem, but pinpointing the source and fixing it can seem daunting. This comprehensive guide will walk you through the process of how to find a leak in your one handle kitchen sink faucet, from initial diagnosis to expert repair techniques. We’ll provide step-by-step instructions, troubleshooting tips, and expert insights to help you solve the problem efficiently and effectively, saving you time, money, and water. Our goal is to equip you with the knowledge and confidence to tackle this repair yourself, while also understanding when it’s best to call in a professional. We’ve drawn on years of plumbing experience and countless faucet repairs to provide you with the most accurate and helpful information available.
Understanding One-Handle Kitchen Sink Faucet Leaks
Before diving into finding the leak, it’s crucial to understand the anatomy of a one-handle kitchen sink faucet and the common causes of leaks. These faucets, while aesthetically pleasing and convenient, can develop leaks due to various factors, primarily wear and tear on internal components.
Common Causes of Leaks in One-Handle Faucets
* **Worn-Out O-Rings and Seals:** These small rubber or silicone rings create watertight seals between faucet components. Over time, they can dry out, crack, or become brittle, leading to leaks.
* **Damaged Cartridge:** The cartridge controls the water flow and temperature. A damaged or faulty cartridge is a frequent culprit behind drips and leaks.
* **Loose or Corroded Connections:** Connections between the faucet body, spout, and water supply lines can loosen over time or corrode, resulting in leaks.
* **High Water Pressure:** Excessive water pressure can stress faucet components, accelerating wear and tear and increasing the likelihood of leaks.
* **Mineral Buildup:** Hard water can lead to mineral deposits that clog and damage faucet parts, contributing to leaks and reduced water flow.
Types of One-Handle Faucets and Their Leak Tendencies
One-handle faucets generally fall into two categories: cartridge faucets and ball-type faucets. While the exterior appearance might be similar, the internal mechanisms differ, and each has its own set of common leak points.
* **Cartridge Faucets:** These faucets use a cylindrical cartridge to control water flow and temperature. Leaks often occur around the base of the handle or from the spout when the faucet is turned off. Cartridge issues are a prevalent cause, and replacing the cartridge is often the solution.
* **Ball-Type Faucets:** These faucets use a slotted ball mechanism. Leaks in ball-type faucets can occur around the handle, spout, or base of the faucet. The seats and springs within the ball mechanism are common culprits.
Understanding the type of faucet you have and its potential weak points will help you narrow down the search for the leak.
Step-by-Step Guide to Find Leak in One Handle Kitchen Sink Faucet
Finding a leak in your one-handle kitchen sink faucet requires a systematic approach. Follow these steps to identify the source of the leak:
Step 1: Gather Your Tools and Materials
Before you begin, gather the necessary tools and materials:
* Screwdrivers (Phillips and flathead)
* Adjustable wrench
* Penetrating oil (for loosening stubborn parts)
* Flashlight or headlamp
* Clean cloths or towels
* Replacement parts (O-rings, cartridge, seats, and springs – based on your faucet type)
* Basin wrench (optional, for removing the faucet)
Step 2: Shut Off the Water Supply
Locate the shut-off valves under the sink. Turn them clockwise until they are completely closed. If you don’t have individual shut-off valves, you’ll need to shut off the main water supply to your house. Test that the water is off by turning on the faucet; only a trickle should come out.
Step 3: Inspect the Faucet Exterior
Carefully examine the faucet body, spout, and handle for any visible signs of leaks. Look for water droplets, mineral buildup, or corrosion. Pay close attention to the following areas:
* **Base of the Handle:** This is a common spot for leaks, especially in cartridge faucets. Look for water seeping out from under the handle.
* **Spout Connection:** Check where the spout connects to the faucet body. Leaks here often indicate a worn-out O-ring.
* **Faucet Base:** Examine the area where the faucet meets the sink. Leaks here could indicate a problem with the faucet’s mounting or the supply line connections.
Step 4: Identify the Leak’s Origin
With the water still turned off, dry the faucet thoroughly with a clean cloth. Then, slowly turn the water supply back on just enough to produce a slow drip or leak. Carefully observe where the water is coming from. Use a flashlight or headlamp to get a better view.
* **Leak Around the Handle:** This often indicates a worn-out cartridge or O-ring.
* **Leak From the Spout:** This could be a sign of a damaged cartridge, worn-out seats and springs (in ball-type faucets), or mineral buildup.
* **Leak From the Base of the Faucet:** This could be due to loose connections, corroded supply lines, or a problem with the faucet’s mounting.
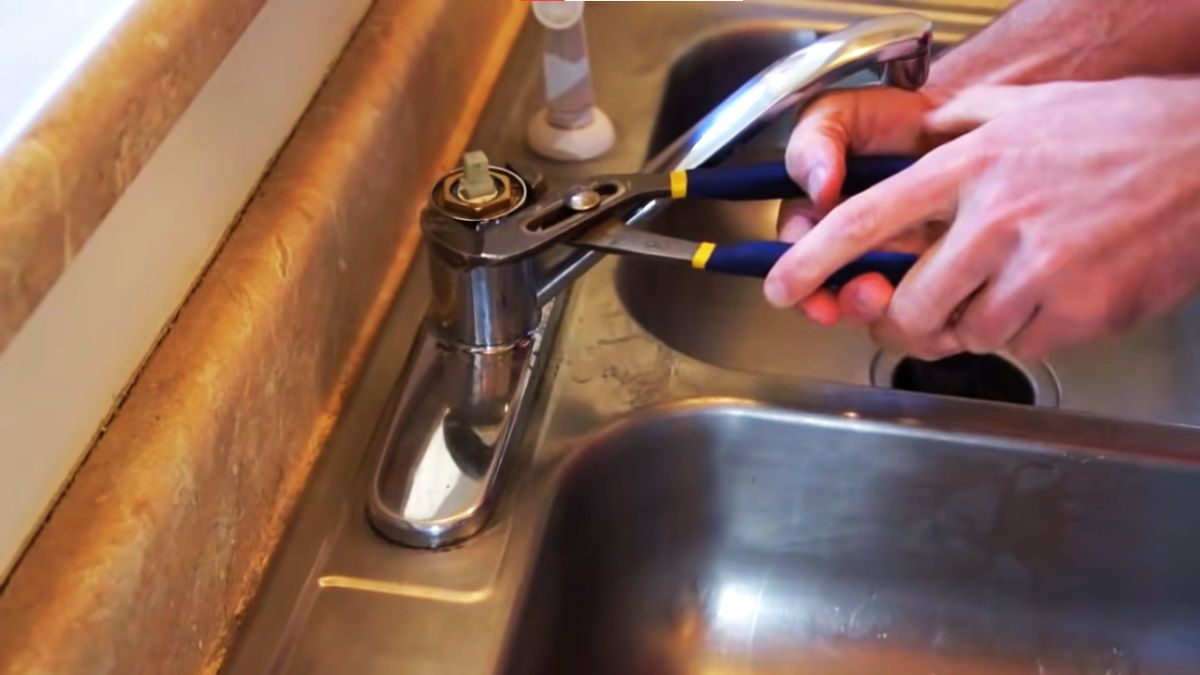
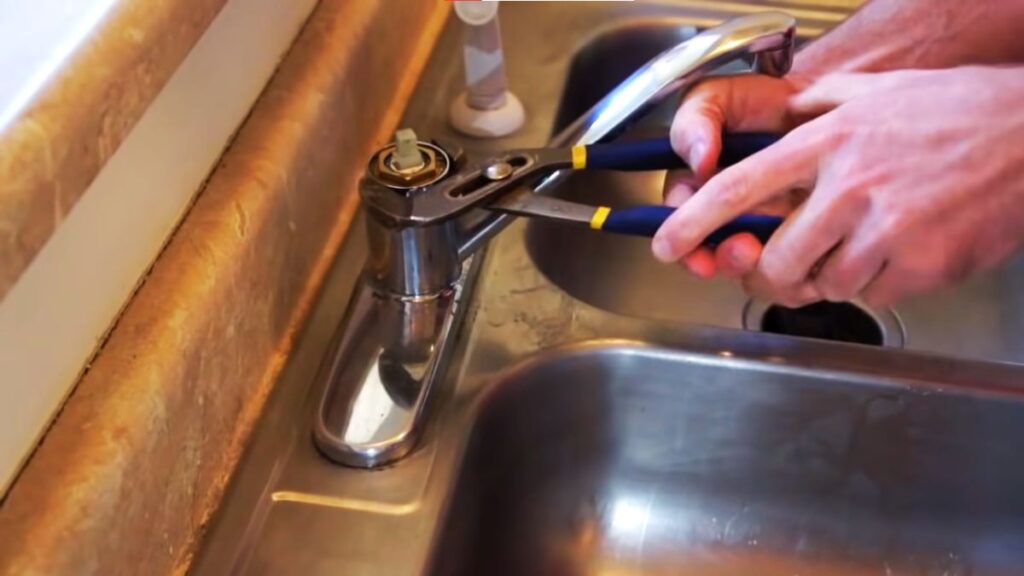
Step 5: Disassemble the Faucet (If Necessary)
If you can’t pinpoint the leak’s origin from the exterior, you may need to disassemble the faucet. Refer to your faucet’s manufacturer’s instructions or search online for a diagram or video tutorial specific to your faucet model. Here’s a general overview of the disassembly process:
* **Remove the Handle:** Typically, there’s a small screw or set screw holding the handle in place. Loosen the screw and remove the handle.
* **Remove the Decorative Cap or Escutcheon:** This cap covers the faucet’s internal components. Use a flathead screwdriver to gently pry it off.
* **Remove the Retaining Nut or Clip:** This nut or clip secures the cartridge or ball mechanism in place. Use an adjustable wrench or pliers to remove it.
* **Remove the Cartridge or Ball Mechanism:** Carefully pull out the cartridge or ball mechanism. Inspect it for damage or wear.
Step 6: Inspect Internal Components
Once you’ve disassembled the faucet, carefully inspect all the internal components for wear, damage, or mineral buildup. Pay close attention to the following:
* **O-Rings and Seals:** Look for cracks, tears, or brittleness. Replace any damaged O-rings.
* **Cartridge:** Check for cracks, chips, or other damage. If the cartridge is visibly damaged or if you suspect it’s faulty, replace it.
* **Seats and Springs (Ball-Type Faucets):** Inspect the seats and springs for wear or corrosion. Replace them if necessary.
* **Faucet Body:** Check for cracks or corrosion in the faucet body. If the faucet body is damaged, you may need to replace the entire faucet.
Advanced Troubleshooting and Repair Techniques
Once you’ve identified the source of the leak, you can begin the repair process. Here are some advanced troubleshooting and repair techniques:
Replacing O-Rings and Seals
* **Choose the Right O-Ring:** Ensure you use the correct size and type of O-ring for your faucet. Consult your faucet’s manufacturer’s instructions or take the old O-ring to a hardware store for comparison.
* **Lubricate the O-Ring:** Before installing a new O-ring, lubricate it with silicone grease. This will help it slide into place and create a better seal.
* **Avoid Over-Tightening:** When reassembling the faucet, avoid over-tightening the screws or nuts. Over-tightening can damage the O-rings and cause leaks.
Replacing the Cartridge
* **Purchase the Correct Cartridge:** Make sure you buy a replacement cartridge that is compatible with your faucet model. Take the old cartridge to a hardware store for comparison.
* **Align the Cartridge Properly:** When installing the new cartridge, ensure it is properly aligned. There’s usually a notch or key that needs to line up with a corresponding feature in the faucet body.
* **Secure the Retaining Nut or Clip:** After installing the cartridge, securely tighten the retaining nut or clip. This will hold the cartridge in place and prevent leaks.
Addressing Loose or Corroded Connections
* **Tighten Connections:** Use an adjustable wrench to tighten any loose connections. Be careful not to over-tighten, as this can damage the fittings.
* **Clean Corroded Connections:** Use a wire brush or sandpaper to clean corroded connections. Apply a corrosion inhibitor to prevent future corrosion.
* **Replace Damaged Supply Lines:** If the supply lines are corroded or damaged, replace them with new ones. Use Teflon tape on the threads to create a watertight seal.
Dealing with Mineral Buildup
* **Soak Parts in Vinegar:** Soak the affected faucet parts in white vinegar to dissolve mineral deposits. Let them soak for several hours or overnight.
* **Use a Lime Scale Remover:** Use a commercial lime scale remover to remove stubborn mineral deposits. Follow the manufacturer’s instructions carefully.
* **Clean Aerator Regularly:** The aerator is the screen at the end of the spout. Clean it regularly to remove mineral deposits and maintain good water flow.
When to Call a Professional Plumber
While many faucet leaks can be repaired DIY, there are situations where it’s best to call a professional plumber:
* **You Can’t Identify the Source of the Leak:** If you’ve followed the steps above and still can’t pinpoint the leak’s origin, a plumber can use their expertise to diagnose the problem.
* **You’re Not Comfortable Disassembling the Faucet:** If you’re not comfortable disassembling the faucet or working with plumbing components, it’s best to leave the repair to a professional.
* **The Faucet is Severely Damaged:** If the faucet body is cracked or corroded, it may need to be replaced. A plumber can safely remove the old faucet and install a new one.
* **You Have Low Water Pressure:** Low water pressure can be a sign of a more serious plumbing problem. A plumber can diagnose the cause of the low pressure and recommend a solution.
* **You Suspect a Slab Leak:** If you suspect a leak in your home’s foundation, call a plumber immediately. Slab leaks can cause significant damage to your home.
Preventing Future Leaks
Preventing future leaks is crucial to saving water and money. Here are some tips to help you keep your faucets leak-free:
* **Inspect Faucets Regularly:** Check your faucets regularly for signs of leaks, such as water droplets, mineral buildup, or corrosion.
* **Replace Worn-Out Parts:** Replace worn-out O-rings, cartridges, and other parts before they cause leaks.
* **Install a Water Softener:** If you have hard water, install a water softener to reduce mineral buildup.
* **Maintain Proper Water Pressure:** Ensure your home’s water pressure is within the recommended range (40-60 PSI). Install a pressure regulator if necessary.
* **Avoid Over-Tightening:** When tightening screws or nuts on your faucets, avoid over-tightening, as this can damage the components.
Q&A: Expert Answers to Your Faucet Leak Questions
Here are some frequently asked questions about faucet leaks and their solutions:
**Q1: Why is my one-handle kitchen faucet leaking from the base?**
A1: A leak from the base often indicates a problem with the faucet’s mounting, loose connections, or corroded supply lines. Tighten the mounting nuts and check the supply line connections for leaks. If the supply lines are corroded, replace them.
**Q2: How do I know if I need to replace the cartridge in my one-handle faucet?**
A2: Common signs of a faulty cartridge include leaks around the handle, drips from the spout when the faucet is turned off, and difficulty controlling water temperature.
**Q3: Can I use any type of lubricant on faucet O-rings?**
A3: No, use only silicone grease specifically designed for plumbing applications. Other lubricants can damage the O-rings.
**Q4: What’s the best way to remove mineral buildup from faucet parts?**
A4: Soaking the parts in white vinegar is an effective and natural way to dissolve mineral deposits. For stubborn buildup, use a commercial lime scale remover.
**Q5: My faucet only drips when the water is turned on. What could be the problem?**
A5: This could indicate a problem with the cartridge or the seats and springs (in ball-type faucets). Inspect these components for wear or damage and replace them if necessary.
**Q6: How often should I replace the O-rings in my faucet?**
A6: It’s recommended to replace O-rings every 2-3 years, or sooner if you notice signs of wear or leaks.
**Q7: What’s the ideal water pressure for my home’s plumbing system?**
A7: The ideal water pressure is between 40 and 60 PSI. Excessive water pressure can damage your plumbing system and cause leaks.
**Q8: Can I use Teflon tape on plastic faucet fittings?**
A8: Yes, Teflon tape can be used on plastic faucet fittings to create a watertight seal. Be careful not to over-tighten the fittings, as this can crack the plastic.
**Q9: My faucet is leaking hot water. Is this a different problem than a cold water leak?**
A9: The cause is likely the same (worn O-rings, cartridge issue, etc.), but be sure to check the hot water supply line and connections specifically, as they can sometimes corrode differently than cold water lines.
**Q10: What if I strip the screw when trying to remove the faucet handle?**
A10: Try using a rubber band or steel wool between the screwdriver and the screw head to get a better grip. If that doesn’t work, you may need to use a screw extractor.
Conclusion
Finding and fixing a leak in your one handle kitchen sink faucet can seem challenging, but with the right knowledge and tools, it’s a manageable task. By understanding the common causes of leaks, following our step-by-step guide, and implementing preventative measures, you can save water, money, and prevent potential water damage to your home. Remember, if you’re unsure about any step in the process, don’t hesitate to call a professional plumber. We’ve shared our expertise, but your safety and the integrity of your plumbing system are paramount. If you have specific questions about finding leaks in faucets, feel free to share your experiences in the comments below. We’re always here to help!
