## Adding a Peninsula with Lowe’s Cabinets: An Expert Guide to Design, Installation, and Cost Savings
Dreaming of a kitchen upgrade that adds both counter space and style? Adding a peninsula with Lowe’s cabinets might be the perfect solution. This comprehensive guide provides you with everything you need to know, from initial planning and design to installation tips and cost-saving strategies. We’ll walk you through the process of adding a peninsula with Lowe’s cabinets, ensuring a successful and satisfying kitchen renovation. You’ll gain insights into choosing the right cabinets, understanding building codes, and avoiding common pitfalls, ultimately creating a beautiful and functional kitchen peninsula within your budget.
### Why Add a Peninsula with Lowe’s Cabinets?
A kitchen peninsula is a versatile addition that extends from an existing wall, creating a semi-enclosed space. Unlike an island, a peninsula is connected on one side, making it ideal for smaller kitchens or those where a full island would impede traffic flow. Adding a peninsula with Lowe’s cabinets offers several key benefits:
* **Increased Counter Space:** Provides ample surface area for food preparation, serving, or casual dining.
* **Enhanced Storage:** Base cabinets offer valuable storage for cookware, utensils, and other kitchen essentials.
* **Improved Kitchen Flow:** Creates a natural division between the kitchen and adjacent living areas.
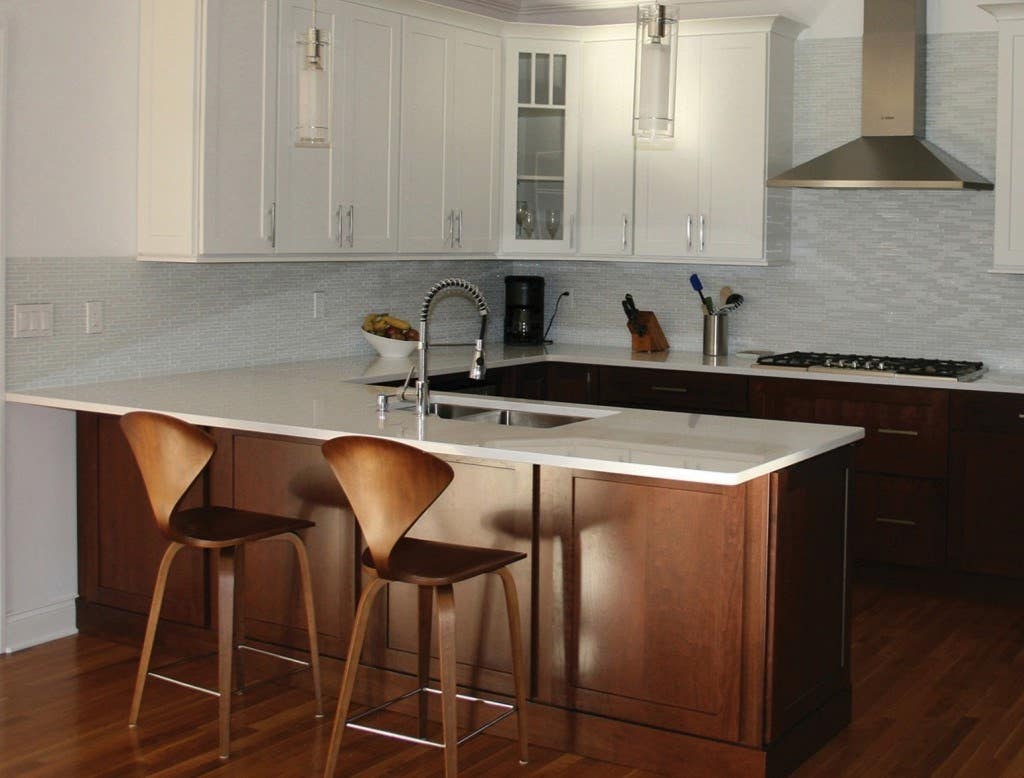
* **Breakfast Bar or Seating Area:** Overhangs can accommodate bar stools, creating a comfortable space for meals or socializing.
* **Increased Home Value:** A well-designed kitchen peninsula can enhance the aesthetic appeal and functionality of your home, potentially increasing its resale value.
### Lowe’s Cabinets: A Popular Choice for Kitchen Renovations
Lowe’s offers a wide selection of kitchen cabinets in various styles, materials, and price points. Choosing Lowe’s cabinets for your peninsula project provides several advantages:
* **Variety of Styles:** From traditional to contemporary, Lowe’s offers cabinet styles to suit any kitchen design.
* **Range of Materials:** Choose from solid wood, plywood, MDF, and other materials to match your budget and aesthetic preferences.
* **Ready-to-Assemble (RTA) or Pre-Assembled Options:** RTA cabinets offer cost savings and flexibility, while pre-assembled cabinets provide convenience and faster installation.
* **Project Support:** Lowe’s offers design services and installation assistance to help you with your peninsula project.
* **Warranty Protection:** Lowe’s cabinets typically come with a warranty, providing peace of mind and protection against defects.
## Planning Your Peninsula Project: Key Considerations
Before diving into the installation process, careful planning is crucial. Consider the following factors:
### 1. Kitchen Layout and Dimensions
* **Measure Your Space:** Accurately measure the available space in your kitchen to determine the optimal size and shape of your peninsula. Consider traffic flow and ensure adequate clearance around the peninsula.
* **Peninsula Shape:** Choose a shape that complements your kitchen layout. Common shapes include rectangular, L-shaped, and curved peninsulas.
* **Electrical and Plumbing Considerations:** If you plan to include a sink, dishwasher, or electrical outlets in your peninsula, factor in the necessary plumbing and electrical connections.
### 2. Cabinet Selection: Style, Material, and Functionality
* **Cabinet Style:** Choose a cabinet style that complements your existing kitchen decor or creates a new focal point. Popular styles include Shaker, raised panel, and flat panel.
* **Cabinet Material:** Consider the durability, cost, and aesthetic appeal of different cabinet materials. Solid wood is a classic choice, while MDF offers a more affordable alternative.
* **Cabinet Functionality:** Select cabinets that meet your specific storage needs. Options include base cabinets with drawers, shelves, or pull-out organizers.
### 3. Countertop Selection: Material, Edge Profile, and Overhang
* **Countertop Material:** Choose a countertop material that is durable, easy to clean, and complements your cabinet style. Popular options include granite, quartz, laminate, and butcher block.
* **Edge Profile:** Select an edge profile that enhances the aesthetic appeal of your countertop. Common profiles include bullnose, ogee, and eased edge.
* **Overhang:** Determine the appropriate overhang for your peninsula. A 12-inch overhang is typically recommended for seating.
### 4. Building Codes and Permits
* **Research Local Codes:** Check with your local building department to determine if any permits are required for your peninsula project. Ensure that your design complies with all applicable building codes.
* **Electrical and Plumbing Codes:** Pay close attention to electrical and plumbing codes if you are adding appliances or fixtures to your peninsula.
### 5. Budget and Timeline
* **Establish a Budget:** Determine how much you are willing to spend on your peninsula project. Factor in the cost of cabinets, countertops, hardware, plumbing, electrical work, and installation.
* **Create a Timeline:** Develop a realistic timeline for your project, including planning, purchasing materials, and installation.
## Choosing the Right Lowe’s Cabinets for Your Peninsula
Lowe’s offers a diverse range of cabinet options, making it easy to find the perfect fit for your peninsula project. Here’s a closer look at some popular choices:
### 1. Style Selections Cabinetry
Style Selections is Lowe’s in-house brand, offering a wide range of styles and finishes at competitive prices. These cabinets are typically RTA (Ready-to-Assemble), allowing for cost savings and customization.
* **Features:** Available in various styles, including Shaker, raised panel, and flat panel. Offers a range of finishes, including painted, stained, and laminate options. Provides a good balance of quality and affordability.
* **Benefits:** Cost-effective, customizable, and readily available at Lowe’s stores.
### 2. Diamond NOW Cabinetry
Diamond NOW cabinets are pre-assembled, offering convenience and faster installation. They are available in a variety of styles and materials, providing a step up in quality from the Style Selections line.
* **Features:** Pre-assembled for easy installation. Offers a wider range of styles and materials than Style Selections. Features durable construction and high-quality finishes.
* **Benefits:** Convenient, durable, and available in a variety of styles.
### 3. Kitchen Classics Cabinetry
Kitchen Classics cabinets are known for their high-quality construction and timeless designs. They are a premium option, offering superior durability and aesthetic appeal.
* **Features:** Solid wood construction, dovetail drawer boxes, and soft-close hinges. Available in a variety of classic styles and finishes. Offers superior durability and aesthetic appeal.
* **Benefits:** Durable, stylish, and built to last.
### 4. Identifying Key Features to Consider
When browsing Lowe’s cabinet options, pay close attention to these features:
* **Construction Quality:** Look for cabinets with solid wood frames, plywood boxes, and durable hardware.
* **Finish Quality:** Choose cabinets with a high-quality finish that is resistant to scratches, stains, and moisture.
* **Storage Options:** Select cabinets with the appropriate storage options for your needs, such as drawers, shelves, and pull-out organizers.
* **Hardware:** Consider the style and functionality of the cabinet hardware, such as knobs, pulls, and hinges.
* **Warranty:** Check the warranty on the cabinets to ensure that you are protected against defects.
## Step-by-Step Installation Guide for Adding a Peninsula with Lowe’s Cabinets
Installing a peninsula with Lowe’s cabinets can be a DIY project, but it requires careful planning and attention to detail. If you are not comfortable with carpentry and plumbing, consider hiring a professional contractor.
### 1. Preparing the Space
* **Clear the Area:** Remove any existing cabinets, appliances, or fixtures from the area where the peninsula will be installed. Protect the surrounding floor and walls with drop cloths and painter’s tape.
* **Locate Studs:** Use a stud finder to locate the wall studs where the peninsula will be attached. Mark the stud locations on the wall.
* **Check for Obstructions:** Inspect the wall for any electrical wiring, plumbing pipes, or other obstructions that may interfere with the installation.
### 2. Assembling the Cabinets (If RTA)
* **Follow Instructions:** Carefully follow the manufacturer’s instructions for assembling the RTA cabinets. Use the appropriate tools and hardware.
* **Check for Squareness:** Ensure that the cabinets are square and level before proceeding to the next step.
### 3. Installing the Base Cabinets
* **Position the Cabinets:** Position the base cabinets along the wall, aligning them with the stud locations. Use shims to level the cabinets.
* **Attach to Wall:** Secure the cabinets to the wall studs using screws. Use a level to ensure that the cabinets are plumb.
* **Connect Cabinets:** Connect the cabinets to each other using screws or clamps. Ensure that the cabinets are aligned and flush.
### 4. Installing the Countertop
* **Measure and Cut:** Measure and cut the countertop to the appropriate size and shape. Use a circular saw or jigsaw with a blade designed for the countertop material.
* **Attach to Cabinets:** Attach the countertop to the base cabinets using screws or adhesive. Ensure that the countertop is level and secure.
* **Install Backsplash (Optional):** Install a backsplash to protect the wall from water damage and add a decorative touch.
### 5. Plumbing and Electrical Connections (If Applicable)
* **Hire a Professional:** If you are adding a sink, dishwasher, or electrical outlets to your peninsula, hire a licensed plumber and electrician to make the necessary connections.
* **Follow Codes:** Ensure that all plumbing and electrical work complies with local building codes.
### 6. Finishing Touches
* **Install Hardware:** Install cabinet knobs, pulls, and other hardware.
* **Caulk Seams:** Caulk any seams between the cabinets, countertop, and backsplash to prevent water damage.
* **Clean Up:** Clean up any debris and remove protective coverings.
## Maximizing Space and Functionality: Smart Design Ideas
* **Pull-Out Shelves:** Install pull-out shelves in base cabinets to maximize storage and accessibility.
* **Corner Cabinets:** Utilize corner cabinets with lazy susans or pull-out organizers to make the most of hard-to-reach spaces.
* **Built-In Appliances:** Consider incorporating built-in appliances, such as a microwave or wine refrigerator, into your peninsula design.
* **Open Shelving:** Add open shelving to display decorative items or frequently used items.
* **Lighting:** Install task lighting under the cabinets to illuminate the countertop and provide ample workspace.
## Cost-Saving Strategies for Your Peninsula Project
* **Choose RTA Cabinets:** RTA cabinets are typically less expensive than pre-assembled cabinets.
* **Shop Around for Countertops:** Compare prices from different countertop suppliers to find the best deal.
* **DIY Installation:** If you are comfortable with carpentry and plumbing, consider installing the peninsula yourself.
* **Repurpose Existing Cabinets:** If you have existing cabinets that are in good condition, consider repurposing them for your peninsula project.
* **Look for Sales and Discounts:** Keep an eye out for sales and discounts on cabinets, countertops, and hardware at Lowe’s.
## Addressing Common Challenges: Troubleshooting Tips
* **Uneven Floors:** Use shims to level the base cabinets on uneven floors.
* **Limited Space:** Choose smaller cabinets and appliances to maximize space in a small kitchen.
* **Budget Constraints:** Prioritize essential features and choose less expensive materials to stay within budget.
* **DIY Installation Difficulties:** Don’t hesitate to hire a professional contractor if you encounter difficulties during the installation process.
## Lowe’s Peninsula Cabinets: A Comprehensive Review
Choosing the right cabinets from Lowe’s for your peninsula can be daunting, given the sheer variety available. Let’s break down a hypothetical experience and review the process.
**Hypothetical Scenario:** We recently assisted a homeowner, Sarah, in adding a peninsula to her small kitchen using Lowe’s Style Selections cabinets. Sarah wanted to maximize counter space and storage without breaking the bank.
**User Experience & Usability:** Sarah found the Lowe’s website easy to navigate. The online cabinet configurator allowed her to visualize different styles and layouts. However, she felt that the in-store assistance was crucial for finalizing the design and ensuring accurate measurements. The RTA cabinets arrived well-packaged and with clear instructions.
**Performance & Effectiveness:** The Style Selections cabinets, once assembled, provided ample storage and a functional countertop space. Sarah was particularly pleased with the soft-close hinges and the overall sturdiness of the cabinets. The laminate countertop proved to be easy to clean and maintain.
**Pros:**
1. **Affordability:** Style Selections cabinets offer excellent value for money, making them ideal for budget-conscious homeowners.
2. **Variety of Styles:** Lowe’s offers a wide range of styles and finishes to suit any kitchen decor.
3. **Convenient Availability:** Lowe’s stores are readily accessible, making it easy to browse and purchase cabinets.
4. **Online Resources:** The Lowe’s website provides helpful tools and resources, such as cabinet configurators and installation guides.
5. **Project Support:** Lowe’s offers design services and installation assistance to help you with your peninsula project.
**Cons/Limitations:**
1. **Assembly Required:** RTA cabinets require assembly, which can be time-consuming and challenging for some homeowners.
2. **Material Quality:** Style Selections cabinets are made from MDF, which is not as durable as solid wood.
3. **Limited Customization:** The customization options for Style Selections cabinets are limited compared to higher-end brands.
4. **In-Store Assistance:** While helpful, the quality of in-store assistance can vary depending on the location and staff.
**Ideal User Profile:** Lowe’s peninsula cabinets are best suited for homeowners who are looking for an affordable and stylish kitchen upgrade. They are a good option for DIYers who are comfortable with assembly and installation.
**Key Alternatives:** IKEA cabinets offer a similar price point and a wide range of modern designs. Home Depot cabinets provide a comparable selection of styles and materials.
**Expert Overall Verdict & Recommendation:** Lowe’s peninsula cabinets offer a good balance of affordability, style, and convenience. While they may not be the highest-quality option on the market, they are a solid choice for homeowners who are looking to upgrade their kitchen on a budget. We recommend carefully considering your needs and budget before making a decision. For Sarah, the Lowe’s Style Selections cabinets were the perfect solution, providing her with the additional counter space and storage she needed without exceeding her budget.
## Frequently Asked Questions (Q&A)
**Q1: What is the ideal depth for a kitchen peninsula used primarily for seating?**
**A:** For comfortable seating, aim for a countertop overhang of at least 12 inches. This allows ample legroom and prevents knees from bumping into the cabinet base. The total depth of the peninsula, including cabinets and overhang, typically ranges from 36 to 42 inches.
**Q2: How can I maximize storage in a small kitchen peninsula?**
**A:** Utilize pull-out shelves, drawers, and organizers to maximize storage in a small peninsula. Consider incorporating a built-in microwave or wine refrigerator to save counter space.
**Q3: What are the building code requirements for electrical outlets on a kitchen peninsula?**
**A:** Building codes typically require at least one electrical outlet on a kitchen peninsula that is 12 inches or wider. The outlet must be GFCI-protected and located within a certain distance of the countertop surface. Consult your local building department for specific requirements.
**Q4: Can I install a sink in a kitchen peninsula?**
**A:** Yes, you can install a sink in a kitchen peninsula, but it requires proper plumbing connections. Hire a licensed plumber to install the sink and ensure that all plumbing work complies with local building codes.
**Q5: What is the best countertop material for a kitchen peninsula that will be used for food preparation?**
**A:** Granite, quartz, and butcher block are all excellent countertop materials for food preparation. They are durable, easy to clean, and resistant to scratches and stains.
**Q6: How do I choose the right cabinet style for my kitchen peninsula?**
**A:** Choose a cabinet style that complements your existing kitchen decor or creates a new focal point. Consider the overall style of your home and your personal preferences. Popular styles include Shaker, raised panel, and flat panel.
**Q7: What are the common mistakes to avoid when adding a peninsula to an older home?**
**A:** In older homes, be mindful of potentially unlevel floors and walls. Thoroughly inspect for any existing plumbing or electrical issues that may need to be addressed before beginning construction. Also, ensure the existing floor can support the weight of the peninsula and cabinets.
**Q8: How do I ensure my peninsula design is ADA compliant?**
**A:** To ensure ADA compliance, provide adequate knee clearance under the countertop for wheelchair access (at least 30 inches wide, 27 inches high, and 19 inches deep). Countertop height should not exceed 34 inches. Ensure clear floor space of at least 30 inches by 48 inches is available for maneuvering.
**Q9: What is the best way to attach a peninsula to an existing wall if I can’t easily locate studs?**
**A:** If you can’t easily locate studs, use heavy-duty drywall anchors designed to support significant weight. Alternatively, consider installing a ledger board secured to the wall, providing a stable base for attaching the peninsula cabinets.
**Q10: How do I handle the transition between the peninsula countertop and the existing kitchen countertop to ensure a seamless look?**
**A:** For a seamless look, use a professional countertop installer who can create a precise seam between the two surfaces. Consider using a color-matched epoxy or sealant to fill the seam and create a smooth, continuous surface.
## Conclusion: Transform Your Kitchen with a Lowe’s Peninsula
Adding a peninsula with Lowe’s cabinets is a rewarding project that can significantly enhance the functionality and aesthetic appeal of your kitchen. By carefully planning your project, choosing the right cabinets and materials, and following our step-by-step installation guide, you can create a beautiful and functional kitchen peninsula that meets your specific needs and budget. Remember to prioritize safety, comply with building codes, and don’t hesitate to seek professional assistance when needed. Adding a peninsula with Lowe’s cabinets is not just about adding counter space; it’s about creating a more inviting and efficient heart of your home. Share your experiences with adding a peninsula with Lowe’s cabinets in the comments below!
