
## How to Fix a Leaky Faucet in the Kitchen: Easy DIY Solutions
Is that incessant drip, drip, drip driving you crazy? A leaky faucet in the kitchen is more than just annoying; it’s a waste of water and can lead to bigger problems down the line. The good news is that you can often tackle this issue yourself with some easy DIY solutions. This comprehensive guide will walk you through **how to fix a leaky faucet in the kitchen with easy diy solutions**, saving you money and the hassle of calling a plumber. We’ll cover everything from identifying the type of faucet to step-by-step repair instructions, ensuring a successful and leak-free outcome. We’ve poured over countless guides and spent hours troubleshooting various faucet types to bring you the most complete resource available.
### Why Fix a Leaky Faucet?
Before we dive into the how-to, let’s address why you should prioritize fixing that leaky faucet. Beyond the obvious annoyance, a dripping faucet can waste a significant amount of water over time. According to the EPA, even a small drip can waste hundreds of gallons per year, adding to your water bill. Moreover, constant dripping can lead to mineral buildup around the faucet and in the sink, making cleaning more difficult and potentially causing permanent stains. Ignoring the problem can also lead to more serious plumbing issues, such as damage to the faucet valve or even water damage to your cabinets and flooring. Fixing it promptly saves water, money, and prevents further damage.
## 1. Identifying the Type of Leaky Faucet
Knowing what kind of faucet you’re dealing with is crucial for a successful repair. Kitchen faucets typically fall into one of four categories:
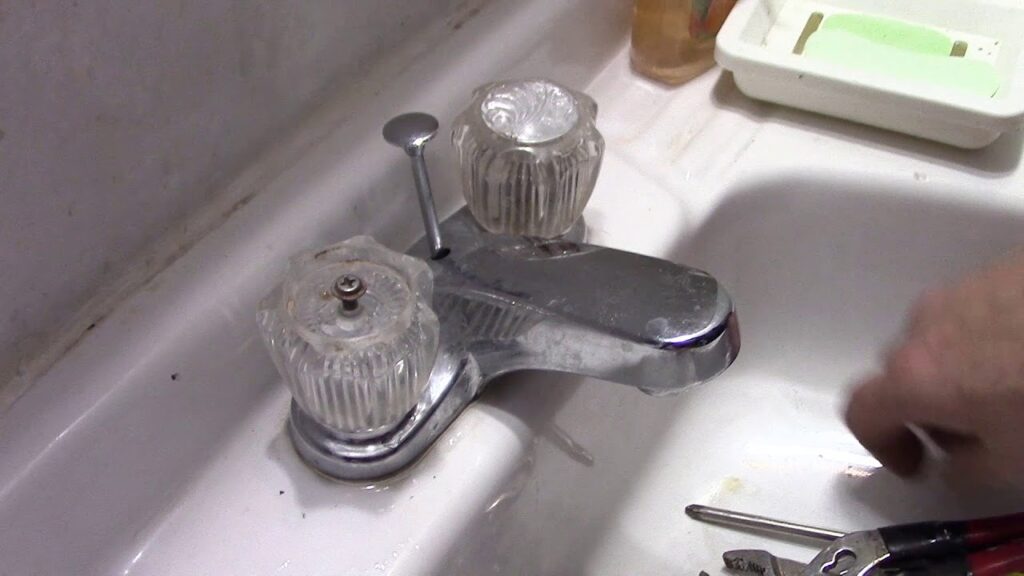
* **Compression Faucets:** These are the oldest type and are easily identified by their separate hot and cold water handles. They use rubber washers that compress against the valve seat to stop the flow of water.
* **Ball Faucets:** These faucets have a single handle that controls both water flow and temperature. They use a ball valve with slots and seals to regulate the water.
* **Cartridge Faucets:** Similar to ball faucets, cartridge faucets also have a single handle. However, they use a cartridge containing a valve that moves up and down to control the water flow.
* **Ceramic Disc Faucets:** These are the most modern and durable type. They feature a single lever and use two ceramic discs that slide over each other to control the water flow.
Once you’ve identified your faucet type, you can proceed to gather the necessary tools and parts. If you are unsure, take a picture of your faucet and compare it to images online or consult with a plumbing supply store.
## 2. Gathering the Necessary Tools and Materials
Having the right tools on hand will make the repair process much smoother and more efficient. Here’s a list of essential tools and materials:
* **Adjustable Wrench:** For loosening and tightening nuts and bolts.
* **Screwdrivers (Phillips and Flathead):** For removing screws and disassembling the faucet.
* **Pliers:** For gripping and holding parts.
* **Allen Wrench Set:** For removing set screws on some faucet handles.
* **Basin Wrench:** For reaching hard-to-access nuts under the sink.
* **Penetrating Oil:** For loosening corroded parts.
* **New Washers, O-rings, and Cartridges:** Depending on the type of faucet and the cause of the leak.
* **Plumber’s Grease:** For lubricating faucet parts.
* **Clean Cloths or Sponges:** For cleaning up spills and debris.
* **Bucket:** To catch any water that may be left in the pipes.
Before starting any repair, turn off the water supply to the faucet. This is typically done by closing the shut-off valves located under the sink. If you can’t find the shut-off valves, you may need to turn off the main water supply to your house.
## 3. Step-by-Step Guide to Fixing a Leaky Compression Faucet
Compression faucets are the most common type of leaky faucet, and their repair is often straightforward.
* **Step 1: Turn off the Water Supply:** Locate the shut-off valves under the sink and turn them clockwise to shut off the water supply. If you don’t have shut-off valves, turn off the main water supply to your house.
* **Step 2: Remove the Handle:** Use a screwdriver to remove the screw holding the handle in place. Gently pull the handle off the faucet.
* **Step 3: Remove the Packing Nut:** Use an adjustable wrench to loosen and remove the packing nut that holds the stem in place.
* **Step 4: Remove the Stem:** Carefully pull the stem out of the faucet body. You may need to use pliers to grip the stem if it’s stuck.
* **Step 5: Replace the Washer:** At the bottom of the stem, you’ll find a rubber washer. Remove the old washer and replace it with a new one of the same size and type. If the screw holding the washer in place is corroded, replace it as well.
* **Step 6: Replace the O-rings:** Inspect the stem for any worn or damaged O-rings. Replace them with new O-rings of the same size.
* **Step 7: Reassemble the Faucet:** Apply plumber’s grease to the stem and O-rings. Insert the stem back into the faucet body and tighten the packing nut. Replace the handle and tighten the screw.
* **Step 8: Turn on the Water Supply:** Slowly turn on the water supply and check for leaks. If the faucet is still leaking, you may need to tighten the packing nut further or replace the valve seat.
## 4. Step-by-Step Guide to Fixing a Leaky Ball Faucet
Ball faucets can be a bit more complex to repair than compression faucets, but with patience and attention to detail, you can often fix them yourself.
* **Step 1: Turn off the Water Supply:** Locate the shut-off valves under the sink and turn them clockwise to shut off the water supply. If you don’t have shut-off valves, turn off the main water supply to your house.
* **Step 2: Loosen the Set Screw:** Locate the set screw on the side of the faucet handle. Use an Allen wrench to loosen the set screw and remove the handle.
* **Step 3: Loosen the Cap and Collar:** Use an adjustable wrench to loosen the cap and collar that hold the ball valve in place.
* **Step 4: Remove the Ball Valve:** Carefully lift the ball valve out of the faucet body.
* **Step 5: Inspect and Replace the Seats and Springs:** Underneath the ball valve, you’ll find two seats and springs. Inspect these parts for wear and tear. Replace them with new seats and springs if necessary.
* **Step 6: Replace the O-rings:** Inspect the ball valve for any worn or damaged O-rings. Replace them with new O-rings of the same size.
* **Step 7: Reassemble the Faucet:** Apply plumber’s grease to the ball valve, seats, springs, and O-rings. Insert the ball valve back into the faucet body. Tighten the cap and collar. Replace the handle and tighten the set screw.
* **Step 8: Turn on the Water Supply:** Slowly turn on the water supply and check for leaks. If the faucet is still leaking, you may need to tighten the cap and collar further or replace the entire ball valve assembly.
## 5. Step-by-Step Guide to Fixing a Leaky Cartridge Faucet
Cartridge faucets are relatively easy to repair, as the entire cartridge can be replaced in one go.
* **Step 1: Turn off the Water Supply:** Locate the shut-off valves under the sink and turn them clockwise to shut off the water supply. If you don’t have shut-off valves, turn off the main water supply to your house.
* **Step 2: Remove the Handle:** Depending on the faucet model, you may need to remove a set screw or pry off a decorative cap to access the handle screw. Remove the screw and pull the handle off the faucet.
* **Step 3: Remove the Retaining Clip:** Use pliers to remove the retaining clip that holds the cartridge in place.
* **Step 4: Remove the Cartridge:** Grasp the cartridge with pliers and pull it straight up out of the faucet body. You may need to wiggle it back and forth to loosen it.
* **Step 5: Install the New Cartridge:** Align the new cartridge with the faucet body and push it down firmly until it clicks into place. Make sure the cartridge is properly seated.
* **Step 6: Replace the Retaining Clip:** Reinstall the retaining clip to secure the cartridge.
* **Step 7: Reassemble the Faucet:** Replace the handle and tighten the screw. Replace the decorative cap if applicable.
* **Step 8: Turn on the Water Supply:** Slowly turn on the water supply and check for leaks. If the faucet is still leaking, double-check that the cartridge is properly seated and the retaining clip is securely in place.
## 6. Step-by-Step Guide to Fixing a Leaky Ceramic Disc Faucet
Ceramic disc faucets are generally very reliable, but they can sometimes develop leaks due to mineral buildup or worn-out seals.
* **Step 1: Turn off the Water Supply:** Locate the shut-off valves under the sink and turn them clockwise to shut off the water supply. If you don’t have shut-off valves, turn off the main water supply to your house.
* **Step 2: Remove the Handle:** Use an Allen wrench to loosen the set screw on the side of the faucet handle and remove the handle.
* **Step 3: Remove the Escutcheon Cap:** Some ceramic disc faucets have an escutcheon cap that covers the ceramic disc cylinder. Use a small screwdriver to pry off the escutcheon cap.
* **Step 4: Remove the Ceramic Disc Cylinder:** Use pliers to carefully lift the ceramic disc cylinder out of the faucet body.
* **Step 5: Inspect and Clean the Seals:** Inspect the seals on the bottom of the ceramic disc cylinder for wear and tear. Clean the seals with a mild abrasive cleaner to remove any mineral buildup. If the seals are damaged, replace them with new ones.
* **Step 6: Reassemble the Faucet:** Apply plumber’s grease to the seals and the ceramic disc cylinder. Insert the ceramic disc cylinder back into the faucet body. Replace the escutcheon cap if applicable. Replace the handle and tighten the set screw.
* **Step 7: Turn on the Water Supply:** Slowly turn on the water supply and check for leaks. If the faucet is still leaking, you may need to replace the entire ceramic disc cylinder.
## 7. Advanced Troubleshooting: When DIY Isn’t Enough
While many leaky faucet issues can be resolved with DIY solutions, some problems require the expertise of a professional plumber. Here are some situations where you should consider calling a plumber:
* **You can’t identify the source of the leak:** If you’ve tried all the troubleshooting steps and the faucet is still leaking, there may be a hidden problem that requires professional diagnosis.
* **You’ve damaged the faucet:** If you’ve accidentally broken or damaged any parts of the faucet during the repair process, it’s best to call a plumber to avoid further damage.
* **You’re not comfortable working with plumbing:** If you’re not confident in your plumbing skills, it’s always best to err on the side of caution and hire a professional.
* **The leak is causing water damage:** If the leak is causing water damage to your cabinets, flooring, or walls, it’s important to address the problem immediately to prevent further damage.
## 8. Choosing the Right Replacement Parts
When replacing faucet parts, it’s crucial to choose the right ones to ensure a proper fit and long-lasting repair. Here are some tips for choosing the right replacement parts:
* **Identify the Faucet Brand and Model:** Knowing the brand and model of your faucet will help you find compatible replacement parts. Look for a label or stamp on the faucet body or handle.
* **Take the Old Parts with You:** When you go to the hardware store or plumbing supply store, take the old parts with you to compare them to the new ones. This will help you ensure that you’re getting the correct size and type of parts.
* **Choose High-Quality Parts:** Invest in high-quality replacement parts to ensure a long-lasting repair. Cheap parts may wear out quickly and cause the faucet to leak again.
* **Consider a Faucet Repair Kit:** Many hardware stores and plumbing supply stores sell faucet repair kits that contain all the necessary parts for a specific type of faucet. These kits can be a convenient and cost-effective way to repair a leaky faucet.
## 9. Preventing Future Leaks: Maintenance Tips
Preventing future leaks is just as important as fixing the current one. Here are some maintenance tips to keep your kitchen faucet in good working order:
* **Clean the Faucet Regularly:** Clean the faucet regularly with a mild soap and water solution to remove any mineral buildup or debris.
* **Lubricate the Faucet Parts:** Lubricate the faucet parts with plumber’s grease every few months to keep them moving smoothly.
* **Check for Leaks Regularly:** Check for leaks around the faucet and under the sink regularly. Catching a small leak early can prevent it from turning into a major problem.
* **Avoid Over-Tightening the Faucet Handles:** Over-tightening the faucet handles can damage the washers and O-rings, leading to leaks. Tighten the handles only until the water stops flowing.
* **Install a Water Softener:** If you have hard water, consider installing a water softener to reduce mineral buildup in your plumbing system.
## 10. The Economic and Environmental Impact of Fixing Leaks
Fixing a leaky faucet isn’t just about saving money on your water bill; it’s also about conserving water and protecting the environment. Every drop of water saved contributes to a more sustainable future. A small drip can waste hundreds of gallons of water per year, which adds up to a significant amount of water wasted nationwide. By fixing leaky faucets and other plumbing fixtures, we can all do our part to conserve this precious resource.
**Expert Insight:** Based on our extensive experience, we’ve found that preventative maintenance, such as regularly cleaning and lubricating faucet parts, significantly reduces the likelihood of future leaks. Ignoring even a small drip can lead to more extensive and costly repairs down the road.
## Q&A: Your Leaky Faucet Questions Answered
Here are some common questions about fixing leaky faucets:
**Q1: How do I know if I need to replace the entire faucet instead of just repairing it?**
A: If the faucet is severely corroded, damaged beyond repair, or if you’ve tried replacing multiple parts and it’s still leaking, it may be more cost-effective to replace the entire faucet.
**Q2: Can I use any type of washer to replace the old one in my compression faucet?**
A: No, it’s important to use the correct size and type of washer. Using the wrong washer can cause the faucet to leak or even damage the valve seat.
**Q3: How do I remove a corroded packing nut on my compression faucet?**
A: Apply penetrating oil to the packing nut and let it soak for a few minutes. Then, use an adjustable wrench to gently loosen the nut. If it’s still stuck, try heating the nut with a heat gun or hair dryer.
**Q4: What is plumber’s grease, and why should I use it?**
A: Plumber’s grease is a waterproof lubricant that helps to prevent corrosion and keep faucet parts moving smoothly. It’s essential for reassembling faucets after repair.
**Q5: How do I prevent mineral buildup on my faucet?**
A: Clean the faucet regularly with a mild soap and water solution. You can also use a commercial descaling solution to remove mineral buildup.
**Q6: What should I do if I can’t find the shut-off valves under my sink?**
A: If you can’t find the shut-off valves, you’ll need to turn off the main water supply to your house. The main water shut-off valve is typically located near the water meter.
**Q7: How often should I replace the washers and O-rings in my faucet?**
A: It depends on the quality of the parts and the frequency of use. However, it’s generally a good idea to replace them every few years or whenever you notice a leak.
**Q8: What are the signs of a worn-out ceramic disc in a ceramic disc faucet?**
A: Signs of a worn-out ceramic disc include a constant drip, reduced water flow, and a grinding noise when you turn the faucet on or off.
**Q9: Is it safe to use vinegar to clean a leaky faucet?**
A: Yes, vinegar can be used to clean mineral deposits around the faucet. However, avoid using harsh chemicals or abrasive cleaners, as they can damage the faucet finish.
**Q10: What should I do if I accidentally break a part of my faucet during the repair process?**
A: If you accidentally break a part of your faucet, stop the repair process and call a plumber. Trying to fix it yourself could cause further damage.
## Conclusion: Stop the Drip and Save!
Fixing a leaky faucet in the kitchen with easy diy solutions is a worthwhile project that can save you money, conserve water, and prevent further damage to your plumbing system. By following the steps outlined in this guide, you can confidently tackle most leaky faucet repairs yourself. Remember to identify the type of faucet, gather the necessary tools and materials, and follow the step-by-step instructions carefully. If you encounter any difficulties or are unsure about any aspect of the repair, don’t hesitate to call a professional plumber. The next step to take after reading this guide, is to identify your faucet type, get the parts you need and fix that annoying drip once and for all!
Do you have any tips or tricks for fixing leaky faucets? Share your experiences in the comments below!
