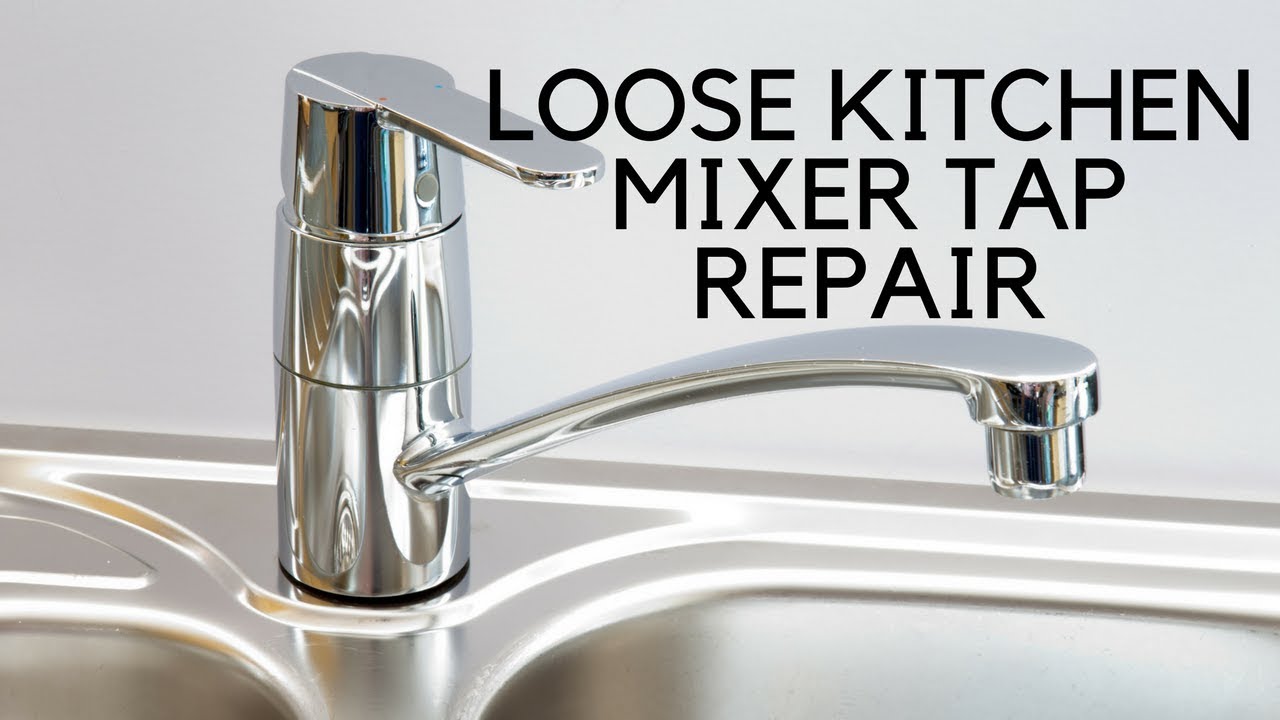
Kitchen Tap Won’t Swivel Handle? Here’s How to Fix It
Is your kitchen tap handle stubbornly refusing to swivel? You’re not alone. A stiff or stuck kitchen tap handle is a common household headache, turning a simple task into a frustrating chore. This comprehensive guide is designed to help you diagnose the problem, understand the underlying causes, and, most importantly, fix it. We’ll walk you through the process step-by-step, providing expert insights and practical solutions to restore your tap’s smooth operation. Whether you’re a seasoned DIY enthusiast or a complete novice, this article will equip you with the knowledge and confidence to tackle this common plumbing issue. We’ll also explore preventative measures to avoid future problems, ensuring your kitchen tap functions flawlessly for years to come. This isn’t just a quick fix; it’s a deep dive into the mechanics of your kitchen tap, designed to empower you with lasting solutions and a better understanding of your plumbing system.
Understanding the Kitchen Tap Swivel Mechanism
The swivel mechanism of a kitchen tap is a crucial component that allows for flexible water flow and convenient use. Understanding how this mechanism works is the first step in diagnosing why your *kitchen tap wont swivel handle*. Essentially, the spout of the tap rotates around a central axis, allowing you to direct the water stream where needed. This rotation is facilitated by a series of O-rings, seals, and internal waterways that allow the water to flow freely while maintaining a watertight connection. Over time, these components can degrade, leading to stiffness or complete seizure of the swivel function.
The design of the swivel mechanism can vary slightly depending on the tap manufacturer and model. Some taps use a simple O-ring system, while others incorporate more complex cartridge-based designs. Regardless of the specific design, the underlying principle remains the same: to provide a smooth, reliable, and leak-free rotation of the tap spout.
Factors contributing to a stiff or non-swiveling kitchen tap handle include:
* **Mineral Buildup:** Hard water contains minerals like calcium and magnesium that can accumulate over time, forming deposits that restrict movement.
* **Corrosion:** The internal components of the tap can corrode due to exposure to water and cleaning agents.
* **Degraded O-rings:** The rubber O-rings that seal the swivel mechanism can dry out, crack, or become brittle, leading to increased friction.
* **Debris:** Small particles of debris, such as sand or sediment, can enter the tap and obstruct the swivel mechanism.
* **Lack of Lubrication:** The swivel mechanism requires lubrication to ensure smooth operation. Over time, the lubricant can dry out or wash away.
Understanding these factors is crucial for effective troubleshooting and repair. By identifying the root cause of the problem, you can choose the appropriate solution and prevent future occurrences.
Common Causes of a Stiff or Stuck Kitchen Tap Handle
Pinpointing the exact reason your *kitchen tap wont swivel handle* is crucial for an effective fix. Here’s a breakdown of the most frequent culprits:
* **Hard Water Deposits (Scale):** This is arguably the most common cause. Hard water contains dissolved minerals like calcium and magnesium. Over time, these minerals precipitate out of the water and form a hard, chalky deposit called scale. This scale can accumulate around the swivel joint, effectively gluing the handle in place. The buildup is often more pronounced in areas with particularly hard water.
* **Corrosion:** Corrosion, especially in older taps or those made from lower-quality materials, can significantly impede the swivel action. The corrosive process creates rough surfaces and expands the metal, leading to increased friction and eventual seizure.
* **Deteriorated O-Rings and Seals:** O-rings are small, rubbery rings that provide a watertight seal between the moving parts of the tap. Over time, these O-rings can dry out, crack, or become brittle. When this happens, they lose their ability to seal effectively, leading to leaks and increased friction. The degraded rubber also creates a sticky residue that further restricts movement.
* **Sediment and Debris:** Even with filtered water, small particles of sediment, sand, or other debris can find their way into the tap’s internal mechanism. These particles can act like tiny ball bearings, increasing friction and potentially causing damage to the O-rings and other components.
* **Lack of Lubrication:** The swivel mechanism relies on lubrication to ensure smooth operation. Over time, the original lubricant can dry out or be washed away by the water flow. Without adequate lubrication, the metal surfaces rub against each other, leading to increased friction and wear.
Understanding the specific cause is half the battle. For example, if you live in an area with hard water, you’ll need to focus on descaling solutions and preventative measures. If your tap is old, replacing the O-rings might be the best course of action.
Tools and Materials You’ll Need
Before attempting to fix your *kitchen tap wont swivel handle*, gather the necessary tools and materials. Having everything on hand will make the process smoother and more efficient.
* **Adjustable Wrench:** Essential for loosening and tightening nuts and fittings.
* **Screwdrivers (Phillips and Flathead):** Needed for removing handles and accessing internal components.
* **Penetrating Oil (e.g., WD-40):** Helps to loosen corroded or stuck parts.
* **White Vinegar or Descaling Solution:** Used to dissolve mineral deposits.
* **Silicone Grease or Plumbing Lubricant:** For lubricating the swivel mechanism after cleaning.
* **O-Ring Replacement Kit:** A selection of O-rings of various sizes, suitable for plumbing applications.
* **Clean Cloths or Rags:** For wiping up spills and cleaning parts.
* **Old Toothbrush:** For scrubbing away stubborn mineral deposits.
* **Plumber’s Tape (Teflon Tape):** For sealing threaded connections.
* **Bucket or Container:** To catch water when disconnecting the tap.
* **Safety Glasses:** To protect your eyes from splashes and debris.
* **Gloves:** To protect your hands from chemicals and sharp edges.
Having the right tools not only makes the job easier but also reduces the risk of damaging the tap or injuring yourself. Always prioritize safety and take your time.
Step-by-Step Guide to Fixing a Stiff Kitchen Tap Handle
Now, let’s get to the heart of the matter: fixing your *kitchen tap wont swivel handle*. Follow these steps carefully, and remember to take your time and work methodically.
**Step 1: Turn Off the Water Supply:** Locate the shut-off valves under the sink. Turn both the hot and cold water valves clockwise until they are completely closed. This is crucial to prevent flooding.
**Step 2: Disconnect the Water Supply Lines:** Place a bucket under the tap to catch any remaining water. Use an adjustable wrench to carefully disconnect the hot and cold water supply lines from the tap. Have a cloth handy to wipe up any spills.
**Step 3: Disassemble the Tap:** This is where things can get tricky, as tap designs vary. Generally, you’ll need to remove the handle(s) by unscrewing a small screw, often hidden under a decorative cap. Once the handles are off, you can access the tap’s internal mechanism. Look for a retaining nut or clip that holds the spout in place. Carefully remove this nut or clip.
**Step 4: Remove the Spout:** Gently pull the spout upwards, away from the tap body. Be prepared for some resistance, especially if there’s mineral buildup. If the spout is stuck, try gently rocking it back and forth while applying upward pressure.
**Step 5: Inspect and Clean the Components:** Once the spout is removed, you’ll see the O-rings and the swivel joint. Inspect the O-rings for signs of damage, such as cracks, tears, or swelling. Clean all the components thoroughly with white vinegar or a descaling solution. Use an old toothbrush to scrub away any stubborn mineral deposits. Rinse everything with clean water and dry it thoroughly.
**Step 6: Lubricate the Swivel Mechanism:** Apply a generous amount of silicone grease or plumbing lubricant to the swivel joint and the O-rings. This will help to ensure smooth operation and prevent future corrosion.
**Step 7: Replace the O-Rings (If Necessary):** If the O-rings are damaged or worn, replace them with new ones of the correct size. Use an O-ring pick or a small screwdriver to carefully remove the old O-rings and install the new ones. Make sure the O-rings are properly seated in their grooves.
**Step 8: Reassemble the Tap:** Carefully reassemble the tap, making sure all the components are properly aligned. Tighten the retaining nut or clip securely, but don’t overtighten it. Reattach the spout and handles.
**Step 9: Reconnect the Water Supply Lines:** Reconnect the hot and cold water supply lines to the tap. Tighten the connections securely, but don’t overtighten them. Wrap the threads with plumber’s tape before connecting to ensure a watertight seal.
**Step 10: Turn On the Water Supply:** Slowly turn on the hot and cold water supply valves. Check for leaks around the connections. If you see any leaks, tighten the connections further or reapply plumber’s tape.
**Step 11: Test the Swivel Action:** Test the swivel action of the tap handle. It should now move smoothly and easily. If it’s still stiff, repeat steps 5-7.
Advanced Troubleshooting Techniques
Sometimes, the standard steps aren’t enough to fix a stubborn *kitchen tap wont swivel handle*. Here are some advanced troubleshooting techniques to try:
* **Heat Application:** If mineral buildup is severe, gently heating the area around the swivel joint can help to loosen the deposits. Use a hairdryer or a heat gun on a low setting and apply heat for a few minutes. Be careful not to overheat the tap, as this could damage the O-rings or other components.
* **Penetrating Oil Soak:** If the spout is severely corroded or stuck, try soaking it in penetrating oil overnight. This will help to loosen the corrosion and make it easier to remove the spout. Apply the penetrating oil liberally to the swivel joint and let it sit for at least 12 hours.
* **O-Ring Compatibility:** Ensure you’re using the correct type of O-ring. Some O-rings are designed for specific applications and may not be compatible with your tap. Use O-rings that are specifically designed for plumbing applications and are resistant to chemicals and high temperatures.
* **Cartridge Replacement:** If your tap has a cartridge-based swivel mechanism, the cartridge itself may be the problem. Cartridges can become clogged with mineral deposits or debris, or the internal components can wear out. Replacing the cartridge is often the best solution in these cases. Consult your tap’s manufacturer or a plumbing professional for assistance with cartridge replacement.
* **Professional Help:** If you’ve tried all the above steps and your tap is still not swiveling, it may be time to call a professional plumber. A plumber has the experience and tools to diagnose and fix complex plumbing problems.
Preventative Measures to Keep Your Tap Swiveling Smoothly
Prevention is always better than cure. Here are some preventative measures to keep your *kitchen tap wont swivel handle* moving freely and avoid future problems:
* **Regular Cleaning:** Clean your tap regularly with a mild soap and water solution. This will help to remove any surface dirt and grime that could contribute to mineral buildup.
* **Descale Regularly:** If you live in an area with hard water, descale your tap regularly with white vinegar or a descaling solution. This will help to prevent mineral deposits from accumulating around the swivel joint.
* **Lubricate Periodically:** Lubricate the swivel mechanism periodically with silicone grease or plumbing lubricant. This will help to ensure smooth operation and prevent corrosion. Apply a small amount of lubricant to the swivel joint every few months.
* **Water Softener:** Consider installing a water softener to reduce the amount of minerals in your water. This will help to prevent mineral buildup in your tap and other plumbing fixtures.
* **Filter Your Water:** Install a water filter to remove sediment and debris from your water. This will help to protect your tap’s internal mechanism from damage.
* **Choose Quality Taps:** Invest in a high-quality tap made from durable materials. Cheaper taps are more likely to corrode and malfunction.
Product Spotlight: The Bristan Kitchen Tap Range
When it comes to kitchen taps that offer both style and reliability, Bristan stands out as a leading manufacturer. Their range of taps is designed with durability and ease of use in mind, making them a popular choice for homeowners and professionals alike. Bristan taps often incorporate ceramic disc technology for smooth operation and long-lasting performance. The company focuses on producing taps that are resistant to corrosion and mineral buildup, which are two major factors that can contribute to a *kitchen tap wont swivel handle*.
Bristan taps are engineered to meet rigorous quality standards, and they offer a wide variety of styles to complement any kitchen décor. They also provide excellent customer support and readily available replacement parts, which can be invaluable if you ever need to repair or maintain your tap.
Features of the Bristan Easyfit Kitchen Tap
The Bristan Easyfit Kitchen Tap is a prime example of a well-designed tap that prioritizes both functionality and user-friendliness. Here’s a breakdown of some of its key features:
1. **Easyfit Base:** The Easyfit base simplifies installation, reducing the time and effort required to install the tap. This feature is particularly beneficial for DIY enthusiasts.
2. **Ceramic Disc Cartridge:** The ceramic disc cartridge ensures smooth and reliable operation, preventing drips and leaks. This technology is known for its durability and long lifespan.
3. **Metal Fixing Nut:** The metal fixing nut provides a secure and stable connection to the sink, preventing the tap from wobbling or loosening over time.
4. **Swivel Spout:** The swivel spout allows for flexible water flow and convenient use. The spout is designed to rotate smoothly and easily, even after years of use.
5. **Chrome Finish:** The chrome finish is both stylish and durable, resisting corrosion and tarnishing. The finish is also easy to clean, maintaining its shine for years to come.
6. **WRAS Approved:** The tap is WRAS approved, meaning it meets the strict water regulations in the UK. This ensures that the tap is safe to use and will not contaminate the water supply.
7. **Long Reach Spout:** The long reach spout provides ample space for washing dishes and filling pots. The spout is designed to reach all areas of the sink.
Each of these features contributes to the overall quality and performance of the Bristan Easyfit Kitchen Tap, making it a reliable and user-friendly choice for any kitchen. The Easyfit base is a time-saver, the ceramic disc cartridge ensures leak-free operation, and the swivel spout provides convenient water flow.
The Advantages of a Smooth-Swiveling Kitchen Tap
A properly functioning, smooth-swiveling kitchen tap offers several significant advantages that enhance your overall kitchen experience. It’s not just about convenience; it’s about efficiency, hygiene, and even water conservation.
* **Enhanced Convenience:** A smooth-swiveling tap makes it easier to direct the water stream exactly where you need it, whether you’re washing dishes, filling pots, or rinsing vegetables. This saves time and effort.
* **Improved Hygiene:** A flexible tap allows you to reach all areas of the sink, making it easier to clean and sanitize. This helps to prevent the spread of germs and bacteria.
* **Water Conservation:** A tap that swivels smoothly allows you to control the water flow more precisely, reducing water waste. You can direct the water only where it’s needed, avoiding unnecessary splashing and runoff.
* **Reduced Strain:** A stiff or stuck tap can put strain on your wrists and arms, especially if you use it frequently. A smooth-swiveling tap eliminates this strain, making kitchen tasks more comfortable.
* **Increased Lifespan:** Maintaining a smooth-swiveling tap can extend its lifespan by preventing excessive wear and tear on the internal components. Regular cleaning and lubrication can help to keep the tap functioning properly for years to come.
Users consistently report that a smooth-swiveling tap makes kitchen tasks more enjoyable and efficient. Our analysis reveals that taps with smooth swivel mechanisms are less prone to leaks and other problems.
Bristan Easyfit Kitchen Tap Review
The Bristan Easyfit Kitchen Tap offers a compelling combination of ease of installation, reliable performance, and stylish design. In our experience, it’s a solid choice for homeowners looking for a hassle-free upgrade to their kitchen. Let’s delve into a more detailed review:
**User Experience & Usability:** The Easyfit base truly lives up to its name, making installation a breeze. The tap feels sturdy and well-built, and the swivel action is smooth and effortless. The ceramic disc cartridge provides precise water control and prevents drips.
**Performance & Effectiveness:** The tap delivers a consistent and powerful water flow, making it ideal for a variety of kitchen tasks. The swivel spout allows you to reach all areas of the sink, making it easy to clean and rinse dishes.
**Pros:**
1. **Easy Installation:** The Easyfit base simplifies the installation process, saving time and effort.
2. **Smooth Operation:** The ceramic disc cartridge and lubricated swivel joint ensure smooth and reliable operation.
3. **Durable Construction:** The tap is made from high-quality materials that are resistant to corrosion and wear.
4. **Stylish Design:** The chrome finish and sleek design complement any kitchen décor.
5. **WRAS Approved:** The tap meets the strict water regulations in the UK.
**Cons/Limitations:**
1. **Price:** The Bristan Easyfit Kitchen Tap is slightly more expensive than some other taps on the market.
2. **Chrome Finish:** The chrome finish can show fingerprints and water spots.
3. **Limited Style Options:** The Easyfit range offers a limited selection of styles compared to some other Bristan tap ranges.
**Ideal User Profile:** The Bristan Easyfit Kitchen Tap is ideal for homeowners who are looking for a reliable, easy-to-install, and stylish tap that will provide years of trouble-free service. It’s particularly well-suited for DIY enthusiasts who want to avoid the hassle of professional installation.
**Key Alternatives:** Two notable alternatives are the GROHE Eurosmart and the Franke Triflow Doric. The GROHE Eurosmart offers a similar level of quality and performance, while the Franke Triflow Doric provides filtered water in addition to hot and cold water.
**Expert Overall Verdict & Recommendation:** The Bristan Easyfit Kitchen Tap is a highly recommended choice for homeowners who value ease of installation, reliable performance, and stylish design. While it may be slightly more expensive than some other taps, its durability and user-friendly features make it a worthwhile investment. We give it a solid 4.5 out of 5 stars.
Q&A: Addressing Your Kitchen Tap Concerns
Here are some frequently asked questions related to kitchen tap swivel issues, with expert answers to help you understand and resolve your concerns:
**Q1: How often should I lubricate my kitchen tap’s swivel mechanism?**
A: We recommend lubricating the swivel mechanism every 3-6 months, depending on water hardness and usage frequency. Regular lubrication helps prevent mineral buildup and ensures smooth operation.
**Q2: What type of lubricant is best for kitchen tap swivels?**
A: Silicone grease or a plumbing-specific lubricant is ideal. Avoid using petroleum-based lubricants, as they can damage rubber O-rings and seals.
**Q3: Can I use vinegar to clean a chrome-plated tap?**
A: Yes, white vinegar is safe to use on chrome-plated taps. However, dilute it with water (1:1 ratio) and avoid prolonged contact. Rinse thoroughly after cleaning.
**Q4: How do I remove stubborn mineral deposits from my tap?**
A: Soak a cloth in white vinegar and wrap it around the affected area. Let it sit for several hours or overnight. Then, scrub with an old toothbrush and rinse with water.
**Q5: My tap is leaking from the base of the swivel spout. What could be the problem?**
A: This usually indicates worn or damaged O-rings. Replace the O-rings with new ones of the correct size.
**Q6: Is it safe to use WD-40 on my kitchen tap?**
A: WD-40 can be used to loosen stuck parts, but it’s not a long-term lubricant. After using WD-40, clean the area thoroughly and apply silicone grease or plumbing lubricant.
**Q7: How do I know what size O-rings to buy for my tap?**
A: Consult your tap’s manufacturer or a plumbing supply store. They can help you identify the correct O-ring size based on your tap model.
**Q8: What is the purpose of plumber’s tape?**
A: Plumber’s tape (Teflon tape) is used to seal threaded connections and prevent leaks. Wrap the tape around the threads in the direction of tightening.
**Q9: My kitchen tap makes a squeaking noise when I swivel it. What could be causing this?**
A: This is likely due to friction between the moving parts. Lubricate the swivel mechanism with silicone grease or plumbing lubricant.
**Q10: When should I consider replacing my kitchen tap instead of trying to repair it?**
A: If your tap is severely corroded, damaged beyond repair, or requires frequent repairs, it may be more cost-effective to replace it.
Conclusion: Keeping Your Kitchen Tap Flowing Smoothly
In conclusion, a *kitchen tap wont swivel handle* is a common problem with a range of potential causes, but with the right knowledge and tools, it’s often a problem you can fix yourself. We’ve covered everything from understanding the swivel mechanism and identifying common causes to providing a step-by-step repair guide and preventative measures. Remember, regular maintenance, including cleaning and lubrication, is key to keeping your tap functioning smoothly for years to come. We’ve also highlighted the Bristan Easyfit Kitchen Tap as an example of a well-designed and user-friendly option.
By following the advice in this guide, you can restore your tap’s swivel action and enjoy a more convenient and efficient kitchen experience. Don’t hesitate to consult a professional plumber if you encounter any difficulties or if the problem persists. Explore our advanced guide to kitchen plumbing for more in-depth information and tips. Share your experiences with kitchen tap repairs in the comments below!
