
Leak Under Kitchen Sink? A Comprehensive Guide to Diagnosis and Repair
Discovering a leak under your kitchen sink can be a homeowner’s nightmare. It’s not just the immediate annoyance of dripping water; it’s the potential for water damage, mold growth, and wasted water. This comprehensive guide is designed to equip you with the knowledge and confidence to diagnose, troubleshoot, and even repair that pesky leak. We’ll cover everything from identifying the source of the leak to understanding the tools and techniques needed for a successful fix. Unlike basic articles, we provide in-depth insights, drawing on years of plumbing experience to offer practical solutions and preventative measures. Our goal is to empower you with the expertise to tackle this common household problem effectively and prevent future occurrences, saving you time, money, and stress.
Understanding Leaks Under the Kitchen Sink: Causes, Types, and Prevention
A leak under the kitchen sink is more than just a nuisance; it’s a symptom of an underlying problem. To effectively address it, you need to understand the common causes, different types of leaks, and how to prevent them in the first place.
Common Causes of Kitchen Sink Leaks
Several factors can contribute to leaks under the kitchen sink:
* **Loose Connections:** Over time, the connections between pipes, faucets, and sprayers can loosen due to vibrations or changes in water pressure. This is a frequent culprit, and tightening these connections is often the first step in resolving the issue.
* **Corroded or Damaged Pipes:** Corrosion, especially in older plumbing systems, can weaken pipes and lead to leaks. Physical damage, such as dents or cracks, can also compromise the integrity of the pipes.
* **Worn-Out Washers and O-Rings:** Washers and O-rings are rubber or plastic seals that create a watertight barrier between connections. These can degrade over time, becoming brittle or cracked, leading to leaks.
* **Clogged Drains:** A clogged drain can cause water to back up into the sink and overflow, potentially leading to leaks around the drainpipe or connections.
* **Faulty Faucet:** Leaks can originate from the faucet itself, either due to worn-out internal components or loose connections to the sink.
Types of Leaks You Might Encounter
Not all leaks are created equal. Identifying the type of leak can help you pinpoint the source and determine the best course of action:
* **Drip Leaks:** These are slow, persistent drips that often originate from loose connections or worn-out washers. While seemingly minor, they can waste a significant amount of water over time and cause water damage.
* **Stream Leaks:** These are more substantial leaks that involve a steady stream of water. They often indicate a more significant problem, such as a cracked pipe or a faulty faucet.
* **Puddle Leaks:** These leaks result in a visible puddle of water accumulating under the sink. They can be caused by a variety of issues, including clogged drains, overflowing garbage disposals, or leaks in the sink basin itself.
* **Spray Leaks:** These leaks involve water spraying out from a connection or pipe. They are often caused by high water pressure or damaged components.
Preventing Leaks: Proactive Measures for a Dry Kitchen
Prevention is always better than cure. Here are some proactive measures you can take to prevent leaks under your kitchen sink:
* **Regular Inspections:** Periodically inspect the pipes, connections, and faucet under your sink for any signs of leaks, corrosion, or damage. Early detection can prevent small problems from escalating into major issues.
* **Tighten Connections:** Regularly tighten any loose connections you find. Use a wrench to gently tighten fittings, but be careful not to overtighten, as this can damage the components.
* **Replace Worn-Out Parts:** Replace any worn-out washers, O-rings, or other components as soon as you notice signs of wear or damage.
* **Avoid Harsh Chemicals:** Avoid pouring harsh chemicals down the drain, as these can corrode pipes and damage seals.
* **Flush Drains Regularly:** Flush your drains regularly with hot water to prevent clogs and buildup of debris.
* **Install a Water Leak Detector:** Consider installing a water leak detector under your sink. These devices can detect leaks early and alert you before they cause significant damage.
By understanding the causes, types, and prevention methods of leaks under the kitchen sink, you can take proactive steps to protect your home and save money on water bills.
The Anatomy of Your Kitchen Sink Plumbing: A Detailed Overview
Before you can effectively troubleshoot a leak under your kitchen sink, it’s essential to understand the basic components of your plumbing system. This knowledge will help you identify the source of the leak and determine the appropriate repair strategy.
Key Components of Kitchen Sink Plumbing
* **Supply Lines:** These flexible tubes connect the water supply to the faucet. They carry both hot and cold water and are typically made of braided stainless steel or flexible plastic.
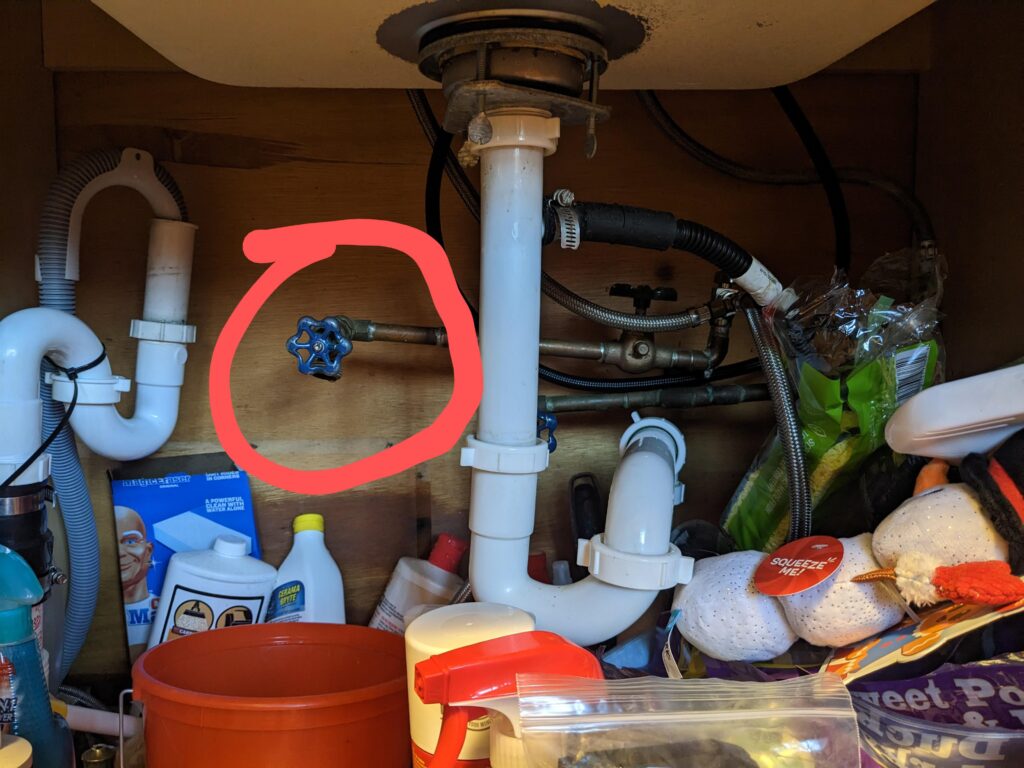
* **Shut-Off Valves:** Located on the supply lines, these valves allow you to turn off the water supply to the sink without shutting off the water to the entire house. This is crucial for making repairs.
* **Faucet:** The faucet controls the flow of water from the supply lines into the sink. It consists of various internal components, including cartridges, O-rings, and washers, which can wear out over time and cause leaks.
* **Drainpipe:** The drainpipe carries wastewater from the sink to the main drain line. It typically consists of several sections connected by fittings.
* **P-Trap:** This U-shaped section of pipe is designed to trap water and prevent sewer gases from entering the house. It’s a critical component for maintaining a healthy and odor-free environment.
* **Garbage Disposal (Optional):** If your sink has a garbage disposal, it’s connected to the drainpipe and grinds up food waste before it enters the sewer system. Leaks can occur around the disposal unit or its connections.
* **Dishwasher Connection (Optional):** If you have a dishwasher, it’s connected to the sink’s drainpipe via a small hose. Leaks can occur at this connection.
Understanding Pipe Materials and Fittings
Kitchen sink plumbing can be made from various materials, each with its own advantages and disadvantages:
* **Copper:** Copper pipes are durable and resistant to corrosion, but they can be expensive and require soldering to connect.
* **PVC (Polyvinyl Chloride):** PVC pipes are inexpensive and easy to install, but they are not as durable as copper and can be damaged by hot water.
* **PEX (Cross-Linked Polyethylene):** PEX pipes are flexible and easy to install, making them a popular choice for DIY projects. They are also resistant to freezing.
* **CPVC (Chlorinated Polyvinyl Chloride):** CPVC pipes are similar to PVC but can withstand higher temperatures, making them suitable for hot water lines.
Fittings are used to connect different sections of pipe and create a watertight seal. Common types of fittings include:
* **Compression Fittings:** These fittings use a compression ring to create a seal between the pipe and the fitting. They are easy to install and do not require soldering.
* **Threaded Fittings:** These fittings have threads that screw together to create a seal. They are commonly used for connecting pipes to faucets and other fixtures.
* **Slip Fittings:** These fittings slide over the pipe and are secured with a clamp. They are commonly used for connecting drainpipes.
By understanding the anatomy of your kitchen sink plumbing, you’ll be better equipped to diagnose and repair leaks effectively. Knowing the different components and materials will also help you choose the right tools and techniques for the job.
Step-by-Step Guide to Diagnosing a Leak Under Your Kitchen Sink
Pinpointing the source of a leak under your kitchen sink can sometimes feel like detective work. However, by following a systematic approach, you can identify the culprit and take the necessary steps to repair it.
Gather Your Tools and Supplies
Before you start your investigation, gather the following tools and supplies:
* **Flashlight:** A flashlight is essential for illuminating dark areas under the sink.
* **Dry Rags or Paper Towels:** Use these to dry off surfaces and make it easier to spot leaks.
* **Bucket or Container:** Place this under the sink to catch any dripping water.
* **Adjustable Wrench:** You’ll need this to tighten or loosen connections.
* **Plumber’s Tape (Teflon Tape):** This is used to seal threaded connections.
Follow These Steps to Find the Leak Source
1. **Clear the Area:** Remove any items stored under the sink to provide a clear view of the plumbing.
2. **Dry Everything:** Use dry rags or paper towels to thoroughly dry all the pipes, connections, and the sink basin itself. This will make it easier to spot fresh leaks.
3. **Inspect the Faucet:** Carefully examine the faucet for any signs of leaks around the base, spout, or handles. Run the faucet and observe if any water is leaking from these areas.
4. **Check the Supply Lines:** Inspect the supply lines for any signs of leaks, cracks, or corrosion. Pay close attention to the connections at both ends of the lines.
5. **Examine the Drainpipe:** Check the drainpipe for any leaks around the connections, P-trap, or garbage disposal (if applicable). Run water down the drain and observe if any water is leaking from these areas.
6. **Inspect the Sink Basin:** Check the sink basin for any cracks or leaks around the edges or the drain opening.
7. **Look for Water Stains:** Look for water stains or discoloration on the cabinet floor or walls, as these can indicate a past or present leak.
8. **Use the Paper Towel Test:** If you’re having trouble pinpointing the source of the leak, wrap paper towels around different sections of the plumbing and observe which ones get wet. This can help you narrow down the location of the leak.
Specific Scenarios and Troubleshooting Tips
* **Dripping from the Faucet Spout:** This often indicates a worn-out cartridge or O-ring inside the faucet. Replacing these components is usually a simple fix.
* **Leak at the Base of the Faucet:** This can be caused by a loose connection or a worn-out seal between the faucet and the sink. Tightening the connection or replacing the seal may resolve the issue.
* **Leak from the Supply Line Connection:** This is often caused by a loose connection or a damaged supply line. Tightening the connection or replacing the supply line may be necessary.
* **Leak from the Drainpipe Connection:** This can be caused by a loose connection or a worn-out washer. Tightening the connection or replacing the washer may fix the problem.
* **Leak from the Garbage Disposal:** This can be caused by a loose connection, a damaged seal, or a crack in the disposal unit itself. Tightening the connection, replacing the seal, or replacing the disposal unit may be required.
By following these steps and tips, you can effectively diagnose a leak under your kitchen sink and take the necessary steps to repair it. Remember to always turn off the water supply before attempting any repairs.
Essential Tools and Materials for Kitchen Sink Leak Repair
Having the right tools and materials on hand is crucial for a successful kitchen sink leak repair. Before you start any repair project, make sure you have the following items:
Tools You’ll Need
* **Adjustable Wrench:** This is an indispensable tool for tightening and loosening connections. Get a good quality wrench with a wide jaw opening.
* **Basin Wrench:** This specialized wrench is designed to reach hard-to-access nuts and bolts under the sink, particularly those securing the faucet.
* **Pliers:** Pliers are useful for gripping and holding small parts, as well as for bending wires.
* **Screwdrivers (Phillips and Flathead):** You’ll need these for removing and installing screws in the faucet and other components.
* **Plumber’s Putty:** This pliable compound is used to seal the gap between the sink and the faucet or drain flange.
* **Plumber’s Tape (Teflon Tape):** This tape is used to seal threaded connections and prevent leaks.
* **Pipe Cutter:** If you need to cut pipes, a pipe cutter is essential for making clean, accurate cuts.
* **Hacksaw:** A hacksaw can be used to cut pipes if you don’t have a pipe cutter.
* **Safety Glasses:** Protect your eyes from debris and splashes.
* **Gloves:** Protect your hands from dirt, grime, and chemicals.
* **Bucket or Container:** Place this under the sink to catch any dripping water.
* **Flashlight:** A flashlight is essential for illuminating dark areas under the sink.
Materials You Might Need
* **Replacement Washers and O-Rings:** These are common culprits for leaks and are relatively inexpensive to replace.
* **Replacement Supply Lines:** If your supply lines are damaged or corroded, you’ll need to replace them.
* **Replacement Drainpipe Sections:** If your drainpipe is cracked or damaged, you’ll need to replace the affected sections.
* **Replacement Faucet Cartridge:** If your faucet is dripping, you may need to replace the cartridge.
* **Replacement Faucet:** If your faucet is severely damaged or beyond repair, you may need to replace it entirely.
* **Drain Cleaner:** A drain cleaner can help clear clogged drains that may be contributing to leaks.
* **Plumber’s Putty:** Use this to seal around the drain flange and faucet base.
* **Thread Sealant:** Use this to seal threaded pipe connections.
**Pro Tip:** Before starting any repair project, take photos of the existing plumbing configuration. This will help you remember how everything goes back together.
Having these essential tools and materials on hand will make your kitchen sink leak repair project much smoother and more efficient. Remember to always turn off the water supply before attempting any repairs.
DIY Repair Techniques for Common Kitchen Sink Leaks
Many common kitchen sink leaks can be repaired with basic DIY techniques. Here are some step-by-step instructions for addressing some of the most frequent issues:
Tightening Loose Connections
This is often the first and easiest step to try when addressing a leak. Use an adjustable wrench to gently tighten any loose connections you find. Be careful not to overtighten, as this can damage the components. After tightening the connections, turn on the water supply and check for leaks. If the leak persists, move on to the next step.
Replacing Washers and O-Rings
Worn-out washers and O-rings are a common cause of leaks. To replace them, follow these steps:
1. Turn off the water supply to the sink.
2. Disassemble the leaking connection.
3. Remove the old washer or O-ring.
4. Clean the area around the connection.
5. Install the new washer or O-ring.
6. Reassemble the connection.
7. Turn on the water supply and check for leaks.
Make sure you use the correct size and type of washer or O-ring for the connection. You can usually find replacement parts at your local hardware store.
Replacing Supply Lines
If your supply lines are damaged or corroded, you’ll need to replace them. Follow these steps:
1. Turn off the water supply to the sink.
2. Disconnect the old supply lines from the faucet and the shut-off valves.
3. Measure the length of the old supply lines.
4. Purchase new supply lines of the same length.
5. Connect the new supply lines to the faucet and the shut-off valves.
6. Turn on the water supply and check for leaks.
Make sure the new supply lines are compatible with your faucet and shut-off valves.
Repairing a Leaky Drainpipe
Leaks in the drainpipe can often be repaired by tightening connections or replacing worn-out washers. However, if the pipe is cracked or damaged, you’ll need to replace the affected section. Follow these steps:
1. Turn off the water supply to the sink.
2. Disassemble the drainpipe at the leaking section.
3. Measure the length of the damaged section.
4. Purchase a new section of drainpipe of the same length.
5. Connect the new section of drainpipe to the existing drainpipe using couplings.
6. Turn on the water supply and check for leaks.
Make sure the new section of drainpipe is compatible with the existing drainpipe.
Replacing a Faucet Cartridge
If your faucet is dripping, you may need to replace the cartridge. Follow these steps:
1. Turn off the water supply to the sink.
2. Remove the faucet handle.
3. Remove the cartridge retaining clip.
4. Pull out the old cartridge.
5. Insert the new cartridge.
6. Replace the cartridge retaining clip.
7. Reinstall the faucet handle.
8. Turn on the water supply and check for leaks.
Make sure you use the correct type of cartridge for your faucet. You can usually find replacement cartridges at your local hardware store.
**Important Note:** When working with plumbing, always turn off the water supply before attempting any repairs. This will prevent flooding and potential water damage.
When to Call a Professional Plumber: Recognizing the Limits of DIY
While many kitchen sink leaks can be repaired with DIY techniques, there are certain situations where it’s best to call a professional plumber. Attempting to fix complex plumbing problems without the proper knowledge and experience can lead to further damage and costly repairs.
Situations That Warrant Professional Help
* **Extensive Water Damage:** If the leak has caused significant water damage to your cabinets, floors, or walls, it’s essential to call a professional plumber to assess the damage and make the necessary repairs. They can also help you identify and address any underlying moisture problems that could lead to mold growth.
* **Persistent Leaks:** If you’ve tried various DIY repair techniques and the leak persists, it’s likely that the problem is more complex than you initially thought. A professional plumber has the expertise and tools to diagnose and repair even the most stubborn leaks.
* **Multiple Leaks:** If you’re experiencing multiple leaks in your kitchen sink plumbing system, it could indicate a larger problem, such as a corroded pipe or a faulty water pressure regulator. A professional plumber can assess the entire system and identify the root cause of the problem.
* **Complex Plumbing Systems:** If your kitchen sink plumbing system is complex or outdated, it’s best to leave repairs to a professional. They have the knowledge and experience to work with different types of plumbing systems and ensure that the repairs are done correctly.
* **Gas Leaks:** If you suspect a gas leak, evacuate the area immediately and call your gas company or a qualified plumber. Gas leaks are extremely dangerous and should only be handled by trained professionals.
* **Lack of Experience:** If you’re not comfortable working with plumbing or you lack the necessary tools and experience, it’s best to call a professional plumber. They can complete the repairs quickly and efficiently, saving you time and potential headaches.
Benefits of Hiring a Professional Plumber
* **Expert Diagnosis:** Professional plumbers have the expertise to accurately diagnose the source of the leak and identify any underlying problems.
* **Proper Repairs:** They have the tools and knowledge to make the necessary repairs correctly, ensuring that the leak is resolved permanently.
* **Warranty Protection:** Many professional plumbers offer warranties on their work, providing you with peace of mind.
* **Code Compliance:** They are familiar with local plumbing codes and regulations, ensuring that the repairs are done in compliance with these standards.
* **Safety:** Working with plumbing can be dangerous, especially if you’re not familiar with the proper techniques. Professional plumbers are trained to work safely and avoid potential hazards.
Cost Considerations
While hiring a professional plumber can be more expensive than DIY repairs, it’s important to consider the long-term costs of a poorly executed repair. A professional plumber can ensure that the repairs are done correctly, preventing further damage and costly repairs down the road.
**Remember:** When in doubt, it’s always best to call a professional plumber. They can provide you with expert advice and ensure that your kitchen sink plumbing system is functioning properly.
Preventative Maintenance: Keeping Your Kitchen Sink Leak-Free
Preventative maintenance is key to keeping your kitchen sink leak-free and avoiding costly repairs. By taking a few simple steps, you can extend the life of your plumbing system and prevent leaks from developing.
Regular Inspections
Periodically inspect the pipes, connections, and faucet under your sink for any signs of leaks, corrosion, or damage. Early detection can prevent small problems from escalating into major issues. Look for:
* **Dampness or Water Stains:** These can indicate a slow leak that needs to be addressed.
* **Corrosion or Rust:** This can weaken pipes and connections, leading to leaks.
* **Loose Connections:** Tighten any loose connections you find.
* **Cracks or Damage:** Replace any damaged components.
Proper Drain Care
Clogged drains can cause water to back up into the sink and overflow, potentially leading to leaks. To prevent clogs, follow these tips:
* **Avoid Pouring Grease Down the Drain:** Grease can solidify in the pipes and cause clogs.
* **Use a Drain Strainer:** A drain strainer can catch food particles and other debris before they enter the drain.
* **Flush Drains Regularly:** Flush your drains regularly with hot water to prevent clogs and buildup of debris.
* **Use a Drain Cleaner:** Use a drain cleaner periodically to dissolve any buildup in the pipes. Choose a drain cleaner that is safe for your pipes.
Faucet Maintenance
Proper faucet maintenance can prevent leaks and extend the life of your faucet. Follow these tips:
* **Clean the Faucet Regularly:** Clean the faucet with a mild soap and water to remove any buildup of dirt and grime.
* **Replace Worn-Out Washers and O-Rings:** Replace any worn-out washers and O-rings as soon as you notice signs of wear or damage.
* **Lubricate Moving Parts:** Lubricate the moving parts of the faucet with a silicone-based lubricant to keep them operating smoothly.
Water Pressure Management
High water pressure can put stress on your plumbing system and lead to leaks. If your water pressure is too high, consider installing a water pressure regulator to reduce the pressure. The ideal water pressure for most homes is between 40 and 60 PSI.
Winterization
If you live in an area with cold winters, it’s important to winterize your plumbing system to prevent pipes from freezing and bursting. Follow these tips:
* **Insulate Pipes:** Insulate any exposed pipes to prevent them from freezing.
* **Let Faucets Drip:** Let faucets drip during extremely cold weather to keep water flowing through the pipes.
* **Turn Off Water Supply:** If you’re going to be away from home for an extended period, turn off the water supply and drain the pipes.
By following these preventative maintenance tips, you can keep your kitchen sink leak-free and avoid costly repairs. Regular maintenance is an investment in the long-term health of your plumbing system.
Q&A: Expert Answers to Common Questions About Kitchen Sink Leaks
Here are some insightful answers to frequently asked questions about kitchen sink leaks, going beyond the basics to address specific concerns:
**Q1: My kitchen sink only leaks when I use the garbage disposal. What’s likely the problem?**
A: This often points to a loose connection or a damaged seal where the disposal unit connects to the drainpipe. The vibrations from the disposal can exacerbate the issue. Inspect the connections and seals carefully, tightening them or replacing them as needed. Also, check the disposal unit itself for any cracks.
**Q2: I have hard water. Does that make my kitchen sink more prone to leaks?**
A: Yes, hard water can contribute to leaks. The minerals in hard water can build up inside pipes and fixtures, causing corrosion and reducing water flow. This buildup can also damage washers and O-rings, leading to leaks. Consider installing a water softener to mitigate the effects of hard water.
**Q3: I’ve tried tightening all the connections, but my kitchen sink still leaks. What should I do next?**
A: If tightening the connections doesn’t solve the problem, the next step is to inspect the washers and O-rings. These components can degrade over time and cause leaks, even if the connections are tight. Replace any worn-out washers and O-rings with new ones.
**Q4: Is it safe to use chemical drain cleaners to clear a clogged kitchen sink drain?**
A: While chemical drain cleaners can be effective at clearing clogs, they can also damage your pipes and fixtures. Harsh chemicals can corrode pipes and damage seals, leading to leaks. It’s best to use natural drain cleaners, such as baking soda and vinegar, or to manually remove the clog with a plumber’s snake.
**Q5: How can I prevent my kitchen sink pipes from freezing in the winter?**
A: To prevent your kitchen sink pipes from freezing, insulate any exposed pipes with pipe insulation. You can also let the faucets drip during extremely cold weather to keep water flowing through the pipes. If you’re going to be away from home for an extended period, turn off the water supply and drain the pipes.
**Q6: My kitchen sink has a slow, persistent drip. Is it worth fixing, or should I just ignore it?**
A: Even a slow, persistent drip can waste a significant amount of water over time and cause water damage. It’s always best to fix any leaks as soon as possible to prevent further damage and save money on your water bill.
**Q7: What’s the difference between plumber’s putty and plumber’s tape? When should I use each one?**
A: Plumber’s putty is a pliable compound used to seal the gap between the sink and the faucet or drain flange. Plumber’s tape (Teflon tape) is used to seal threaded connections. Use plumber’s putty to create a watertight seal around the faucet and drain flange, and use plumber’s tape to seal threaded pipe connections.
**Q8: I’m thinking about replacing my kitchen sink faucet. Are there any special considerations I should keep in mind?**
A: When replacing your kitchen sink faucet, make sure the new faucet is compatible with your sink’s hole configuration. Also, consider the style and finish of the new faucet to ensure it matches your kitchen decor. Finally, be sure to turn off the water supply before removing the old faucet and installing the new one.
**Q9: My kitchen sink is leaking from the sprayer. Is that a difficult fix?**
A: A leaky sprayer is often due to a worn-out O-ring or a cracked sprayer head. Replacing the O-ring is a simple fix. If the sprayer head is cracked, you’ll need to replace the entire sprayer assembly.
**Q10: What are the long-term consequences of ignoring a leak under my kitchen sink?**
A: Ignoring a leak under your kitchen sink can lead to a variety of problems, including water damage, mold growth, and wasted water. Water damage can ruin your cabinets, floors, and walls. Mold growth can cause health problems and require expensive remediation. Wasted water can increase your water bill. It’s always best to fix any leaks as soon as possible to prevent these problems from occurring.
Conclusion: Taking Control of Kitchen Sink Leaks
Dealing with a leak under your kitchen sink can seem daunting, but with the right knowledge and tools, you can effectively diagnose, troubleshoot, and even repair many common issues. This comprehensive guide has equipped you with the expertise to understand the causes of leaks, identify the source, and implement appropriate solutions. We’ve emphasized the importance of preventative maintenance, regular inspections, and knowing when to call a professional.
Remember, addressing leaks promptly not only saves you money on water bills but also prevents potential water damage and mold growth. By taking control of your kitchen sink plumbing, you can protect your home and ensure a healthy living environment. Now that you’re armed with this knowledge, share your experiences with leak under kitchen sink in the comments below. Explore our advanced guide to [related topic], or contact our experts for a consultation on leak under kitchen sink.
