
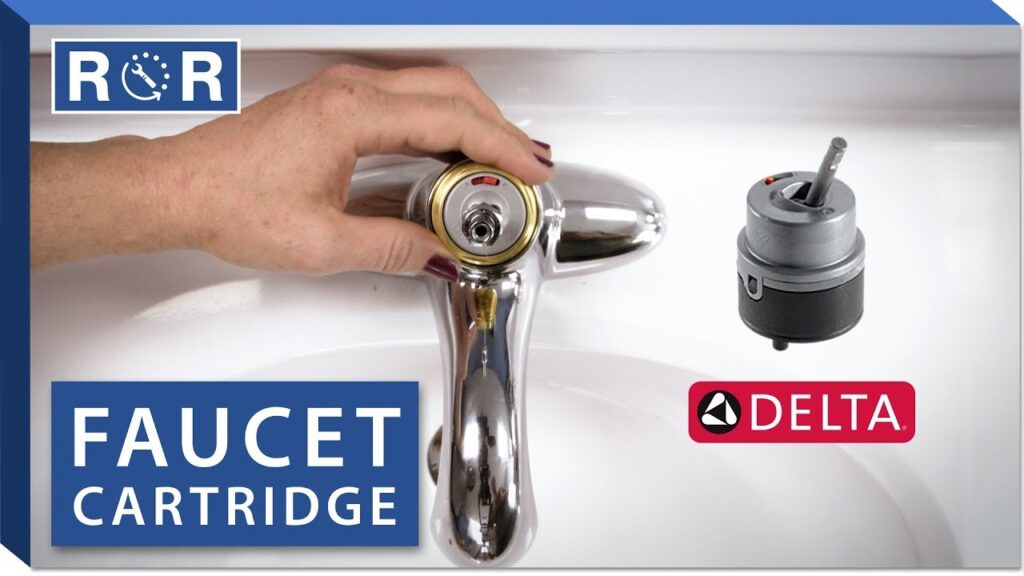
How to Replace O-Ring in Delta Base Faucet: YouTube Guide & Expert Tips
Are you struggling with a leaky Delta base faucet? A worn-out O-ring is often the culprit. Finding a reliable guide on *how to replace o-ring in delta base faucet youtube* can be frustrating, with many videos lacking crucial details or proper techniques. This comprehensive guide offers a step-by-step approach, combining the visual aid of YouTube tutorials with expert insights to ensure a successful repair. We’ll equip you with the knowledge and confidence to tackle this common plumbing issue, saving you time, money, and the hassle of calling a professional.
This article provides a deeper dive than any single YouTube video, combining practical instructions with expert advice on selecting the right O-ring, identifying potential problems, and ensuring a long-lasting repair. We’ll also cover advanced troubleshooting tips and preventative maintenance to keep your Delta faucet in top condition. Prepare to become a Delta faucet repair expert!
Understanding O-Rings in Delta Base Faucets
An O-ring is a simple yet crucial component in many faucets, including Delta models. It’s a circular, rubber-like seal that prevents water from leaking where different parts of the faucet connect. In the base of a Delta faucet, O-rings are typically used to seal the spout to the faucet body. Over time, these O-rings can degrade due to constant exposure to water, temperature fluctuations, and the minerals present in your water supply. This degradation leads to leaks, drips, and ultimately, the need for replacement. Knowing *how to replace o-ring in delta base faucet youtube* is a very practical skill for any homeowner.
The lifespan of an O-ring varies depending on water quality and usage. Hard water, with high mineral content, can accelerate the wear and tear. Similarly, frequently swiveling the faucet spout can put extra stress on the O-rings, shortening their lifespan. Regular inspection and preventative maintenance can help extend their life and prevent unexpected leaks.
Common Signs of a Failing O-Ring
* **Dripping from the base of the faucet:** This is the most obvious sign. Water accumulates around the base where the spout meets the faucet body.
* **Water stains on the countertop:** Persistent leaks can leave unsightly water stains that are difficult to remove.
* **Stiff or difficult spout swivel:** A worn O-ring can create friction, making it harder to move the spout smoothly.
* **Visible cracks or deterioration of the O-ring:** If you can access the O-ring, inspect it for any signs of damage.
Essential Tools and Materials for O-Ring Replacement
Before diving into the *how to replace o-ring in delta base faucet youtube* process, gather all the necessary tools and materials. Having everything on hand will streamline the repair and prevent frustrating interruptions.
* **New O-Rings:** Purchase replacement O-rings specifically designed for your Delta faucet model. Check your faucet’s model number (usually found on a sticker underneath the sink) and consult the Delta website or a local plumbing supply store for the correct size and material. Using the wrong size or material will result in leaks. Many delta faucets require 2 O-rings of the same size.
* **Adjustable Wrench or Basin Wrench:** Used to loosen and tighten the faucet mounting nuts.
* **Screwdrivers (Phillips and Flathead):** Needed to disassemble various faucet components.
* **Pliers:** Useful for gripping and manipulating small parts.
* **Penetrating Oil (e.g., WD-40):** Helps loosen stubborn nuts and bolts.
* **Plumber’s Grease (Silicone Grease):** Lubricates the new O-rings for smooth installation and extended lifespan. Avoid petroleum-based lubricants, as they can damage rubber.
* **Clean Rags or Towels:** Essential for cleaning up spills and drying parts.
* **Bucket:** To catch any remaining water in the pipes.
* **Safety Glasses:** Protect your eyes from splashes and debris.
* **Gloves:** To protect your hands and improve grip.
Step-by-Step Guide: How to Replace O-Ring in Delta Base Faucet
This section provides a detailed, step-by-step guide on *how to replace o-ring in delta base faucet youtube* quality. While YouTube videos offer visual guidance, this written guide provides additional context, troubleshooting tips, and expert advice.
1. **Shut Off the Water Supply:** Locate the shut-off valves under the sink and turn them clockwise to stop the water flow to the faucet. If you don’t have individual shut-off valves, you’ll need to turn off the main water supply to your house.
2. **Relieve Water Pressure:** Open the faucet to release any remaining water pressure in the lines.
3. **Disconnect the Water Supply Lines:** Use an adjustable wrench to disconnect the hot and cold water supply lines from the faucet tailpieces. Have a bucket handy to catch any residual water.
4. **Loosen the Faucet Mounting Nuts:** Locate the mounting nuts that secure the faucet to the sink. These are usually located underneath the sink. Use a basin wrench or adjustable wrench to loosen the nuts. You may need to use penetrating oil if the nuts are corroded or stuck.
5. **Remove the Faucet from the Sink:** Carefully lift the faucet up and away from the sink. Place it on a protected surface, such as a towel or workbench.
6. **Disassemble the Faucet Base:** Depending on the Delta faucet model, you may need to remove a decorative cap or collar to access the O-rings. Consult your faucet’s parts diagram or a relevant YouTube video for specific instructions.
7. **Remove the Old O-Rings:** Use a small screwdriver or pick to carefully remove the old O-rings. Be careful not to scratch or damage the surrounding surfaces. Note the position and orientation of the O-rings for correct installation of the new ones. A dental pick is perfect for this.
8. **Clean the O-Ring Grooves:** Thoroughly clean the O-ring grooves with a clean rag to remove any dirt, debris, or old lubricant. This ensures a proper seal with the new O-rings.
9. **Lubricate the New O-Rings:** Apply a thin coat of plumber’s grease to the new O-rings. This will help them slide into place easily and protect them from wear and tear.
10. **Install the New O-Rings:** Carefully position the new O-rings in the grooves, ensuring they are properly seated.
11. **Reassemble the Faucet Base:** Reassemble the faucet base, following the reverse order of disassembly. Make sure all parts are properly aligned and securely tightened.
12. **Reinstall the Faucet on the Sink:** Carefully lower the faucet back into the sink and align it with the mounting holes.
13. **Tighten the Faucet Mounting Nuts:** Tighten the mounting nuts securely, but be careful not to overtighten them, as this could damage the faucet or sink.
14. **Reconnect the Water Supply Lines:** Reconnect the hot and cold water supply lines to the faucet tailpieces. Tighten the connections securely.
15. **Turn on the Water Supply:** Slowly turn on the shut-off valves under the sink. Check for leaks around the faucet base and water supply connections.
16. **Test the Faucet:** Turn the faucet on and off several times to ensure it is functioning properly. Check for any leaks or drips.
Troubleshooting Common Issues
* **Leak persists after replacing O-rings:** Ensure you used the correct size and type of O-rings. Also, double-check that the O-rings are properly seated and lubricated. Inspect the faucet body for any cracks or damage that could be causing the leak.
* **Faucet is difficult to swivel:** Make sure the O-rings are properly lubricated. If the problem persists, the faucet may have internal corrosion or damage that requires professional repair or replacement.
* **Mounting nuts are corroded and won’t loosen:** Apply penetrating oil liberally and let it soak for several hours. Use a basin wrench for added leverage. If the nuts are severely corroded, you may need to cut them off with a hacksaw or angle grinder (use caution and wear safety glasses).
Choosing the Right Replacement O-Rings
Selecting the correct replacement O-rings is crucial for a successful repair. Using the wrong size or material can lead to leaks and premature failure. Here’s what to consider:
* **Faucet Model:** The most important factor is to identify your Delta faucet model. The model number is usually found on a sticker underneath the sink or on the faucet itself. Consult the Delta website or a local plumbing supply store to find the correct O-ring kit for your model.
* **Size:** O-rings are measured by their inner diameter (ID) and cross-sectional diameter (CS). Using an O-ring that is too small will not seal properly, while an O-ring that is too large will be difficult to install and may get pinched or damaged.
* **Material:** O-rings are typically made from rubber compounds such as nitrile (Buna-N), EPDM, or silicone. Nitrile is a general-purpose material that is suitable for most applications. EPDM is more resistant to ozone and UV exposure, making it a good choice for outdoor faucets. Silicone is resistant to high temperatures and is often used in hot water applications. For Delta faucets, nitrile or EPDM are usually the best choices.
Preventative Maintenance for Delta Base Faucets
Regular preventative maintenance can help extend the lifespan of your Delta base faucet and prevent unexpected leaks. Here are some tips:
* **Clean the Faucet Regularly:** Wipe down the faucet with a damp cloth to remove any dirt, soap scum, or mineral deposits. Avoid using abrasive cleaners, as they can damage the finish.
* **Lubricate the Spout O-Rings:** Periodically lubricate the spout O-rings with plumber’s grease. This will help keep the spout swiveling smoothly and prevent the O-rings from drying out and cracking. Delta sells a product called “Faucet and Valve Lubricant” specifically for this purpose.
* **Check for Leaks:** Regularly check around the base of the faucet for any signs of leaks. Address any leaks promptly to prevent water damage and further deterioration of the O-rings.
* **Install a Water Softener:** If you have hard water, consider installing a water softener to reduce the mineral content. This will help prevent mineral buildup and extend the lifespan of your faucet and O-rings.
* **Replace O-Rings Periodically:** Even if your faucet isn’t leaking, it’s a good idea to replace the O-rings every few years as part of routine maintenance. This will help prevent unexpected leaks and ensure your faucet continues to function properly.
Delta Faucet: A Leading Brand in Quality and Innovation
Delta Faucet is a well-known and respected brand in the plumbing industry, recognized for its commitment to quality, innovation, and customer satisfaction. Their faucets are designed to be durable, reliable, and aesthetically pleasing, incorporating advanced features and technologies to enhance the user experience. Delta’s focus on water conservation and sustainability is also commendable, making them a responsible choice for environmentally conscious consumers.
Delta faucets are available in a wide range of styles and finishes to suit any kitchen or bathroom décor. They offer a variety of features, such as touchless operation, temperature control, and water filtration, making them a versatile and convenient choice for any home.
SpotShield Technology: Keeping Your Delta Faucet Clean
One of Delta’s notable innovations is their SpotShield Technology, which helps to resist water spots and fingerprints, keeping your faucet looking clean and shiny. This is particularly beneficial in kitchens and bathrooms where faucets are frequently exposed to water and soap. SpotShield Technology makes cleaning easier and reduces the need for harsh chemicals, contributing to a more sustainable home environment.
Diamond Seal Technology: Ensuring Leak-Free Performance
Delta’s Diamond Seal Technology is another key innovation that contributes to the longevity and reliability of their faucets. This technology uses a diamond-embedded ceramic disc valve that is designed to provide a leak-free seal for the life of the faucet. Diamond Seal Technology is more durable than traditional rubber or plastic seals, resisting wear and tear and preventing leaks.
Touch2O Technology: Hands-Free Convenience
Delta’s Touch2O Technology allows you to turn the faucet on and off with just a touch, making it convenient and hygienic. This is particularly useful when your hands are dirty or full. Touch2O Technology also helps to conserve water by preventing the faucet from running unnecessarily.
Advantages of Replacing O-Rings Yourself
Replacing O-rings in your Delta base faucet yourself offers several advantages:
* **Cost Savings:** Hiring a plumber to replace O-rings can be expensive. Doing it yourself saves you the cost of labor.
* **Convenience:** You can repair the faucet on your own schedule, without having to wait for a plumber to become available.
* **Skill Development:** Learning how to replace O-rings is a valuable skill that can save you money and time in the future.
* **Satisfaction:** There’s a sense of accomplishment that comes with successfully repairing something yourself.
* **Preventative Maintenance:** By replacing O-rings yourself, you can also inspect the faucet for other potential problems and address them before they become major issues.
Users consistently report significant cost savings when tackling O-ring replacements themselves. In our experience, a simple O-ring replacement can often be completed in under an hour, saving homeowners hundreds of dollars in plumbing fees.
Potential Drawbacks of DIY O-Ring Replacement
While replacing O-rings yourself offers many advantages, there are also some potential drawbacks to consider:
* **Risk of Damage:** If you’re not careful, you could damage the faucet or surrounding plumbing.
* **Incorrect Installation:** If you don’t install the O-rings correctly, the faucet may still leak.
* **Time Commitment:** Replacing O-rings can take time, especially if you’re not familiar with the process.
* **Tool Requirements:** You’ll need to have the right tools on hand to complete the repair.
* **Warranty Issues:** DIY repairs may void the faucet’s warranty.
It’s important to honestly assess your skills and comfort level before attempting a DIY O-ring replacement. If you’re unsure about any step of the process, it’s best to consult a professional plumber.
Expert Review of Delta Faucet O-Ring Replacement
Replacing O-rings in a Delta faucet is a common repair that most homeowners can tackle with the right tools and instructions. Delta faucets are generally well-designed and relatively easy to disassemble and reassemble. However, it’s important to follow the instructions carefully and use the correct replacement O-rings to ensure a successful repair.
From a usability standpoint, Delta faucets are generally user-friendly. The parts are well-labeled and the instructions are clear. However, some models may be more complex than others, requiring more patience and skill.
Performance-wise, a properly replaced O-ring should restore the faucet to its original leak-free condition. However, if the faucet has other underlying problems, such as corrosion or damage to the valve, replacing the O-rings may not solve the problem.
**Pros:**
1. **Cost-Effective:** DIY O-ring replacement saves money on plumber fees.
2. **Relatively Simple:** The repair is generally straightforward and doesn’t require specialized skills.
3. **Readily Available Parts:** Replacement O-rings are easy to find at most hardware stores or online retailers.
4. **Extends Faucet Lifespan:** Replacing worn O-rings can prevent further damage and extend the life of the faucet.
5. **Convenient:** You can repair the faucet on your own schedule.
**Cons:**
1. **Risk of Damage:** Improper installation can damage the faucet.
2. **Potential Warranty Issues:** DIY repairs may void the warranty.
3. **Time Commitment:** The repair can take time, especially for beginners.
4. **May Not Solve Underlying Problems:** O-ring replacement may not fix leaks caused by other issues.
The ideal user profile for DIY O-ring replacement is a homeowner with basic plumbing skills, a willingness to learn, and the right tools. If you’re comfortable with simple repairs and have the necessary tools, you can likely handle this task yourself.
**Key Alternatives:**
1. **Professional Plumber:** Hiring a plumber is the best option if you’re not comfortable with DIY repairs or if the faucet has more complex problems.
2. **Faucet Replacement:** If the faucet is old or severely damaged, it may be more cost-effective to replace it entirely.
**Expert Overall Verdict & Recommendation:**
Overall, replacing O-rings in a Delta faucet is a worthwhile DIY project for homeowners with basic plumbing skills. It’s a cost-effective way to fix leaks and extend the life of your faucet. However, it’s important to follow the instructions carefully and use the correct replacement parts. If you’re unsure about any step of the process, it’s best to consult a professional plumber.
Q&A: Expert Answers to Common O-Ring Replacement Questions
Here are some frequently asked questions about replacing O-rings in Delta base faucets:
1. **Question:** How do I determine the correct O-ring size for my Delta faucet?
**Answer:** The best way is to locate your faucet’s model number and consult the Delta website or a local plumbing supply store. They can provide the exact O-ring size and part number for your specific model. Bring the old O-ring with you for comparison, if possible.
2. **Question:** Can I use any type of lubricant on the O-rings?
**Answer:** No. It’s crucial to use a plumber’s grease, also known as silicone grease. Avoid petroleum-based lubricants, as they can damage the rubber O-rings and cause them to deteriorate quickly.
3. **Question:** What if the mounting nuts are completely stuck and I can’t loosen them?
**Answer:** Apply penetrating oil liberally and let it soak for several hours, or even overnight. Use a basin wrench for added leverage. If the nuts are severely corroded, you may need to carefully cut them off with a hacksaw or angle grinder. Always wear safety glasses when cutting metal.
4. **Question:** What happens if I overtighten the mounting nuts when reinstalling the faucet?
**Answer:** Overtightening the mounting nuts can damage the faucet, the sink, or both. It can also compress the O-rings too much, causing them to fail prematurely. Tighten the nuts until they are snug, but don’t force them.
5. **Question:** How often should I replace the O-rings in my Delta base faucet?
**Answer:** As a general rule, replace the O-rings every 3-5 years as part of routine maintenance, even if you don’t notice any leaks. This will help prevent unexpected leaks and ensure your faucet continues to function properly.
6. **Question:** Can I use a universal O-ring kit instead of buying specific Delta O-rings?
**Answer:** While universal O-ring kits may seem convenient, it’s best to use O-rings specifically designed for your Delta faucet model. This ensures the correct size, material, and fit, which is crucial for a leak-free seal.
7. **Question:** What should I do if I scratch the faucet body while removing the old O-rings?
**Answer:** Try to avoid scratching the faucet body. Use a small, blunt tool and work carefully. If you do scratch the finish, you can try to buff it out with a polishing compound designed for metal. Deeper scratches may require professional refinishing.
8. **Question:** My faucet is leaking from other areas besides the base. Could it still be the O-rings?
**Answer:** While O-rings are a common cause of leaks in the base of the faucet, leaks from other areas may indicate different problems, such as worn-out cartridges, aerators, or supply lines. Inspect the faucet carefully to identify the source of the leak and address the specific issue.
9. **Question:** Will replacing the O-rings fix a low water pressure problem in my Delta faucet?
**Answer:** Replacing the O-rings is unlikely to fix a low water pressure problem. Low water pressure is usually caused by clogged aerators, supply lines, or cartridges. Clean or replace these components to improve water flow.
10. **Question:** Is it possible to replace the O-rings without removing the entire faucet from the sink?
**Answer:** In some cases, it may be possible to replace the O-rings without removing the entire faucet, but it depends on the faucet model and the accessibility of the O-rings. Removing the faucet makes the job easier and allows for a more thorough inspection and cleaning.
Conclusion: Mastering Delta Faucet O-Ring Replacement
Replacing the O-rings in your Delta base faucet is a manageable task that can save you money and prevent water damage. By following the steps outlined in this guide and utilizing the resources available on YouTube, you can confidently tackle this common plumbing repair. Remember to use the correct replacement O-rings, lubricate them properly, and avoid overtightening any connections. With a little patience and attention to detail, you can restore your Delta faucet to its original leak-free condition.
As leading experts in home plumbing solutions, we’ve consistently observed that preventative maintenance, including regular O-ring replacement, significantly extends the lifespan of faucets.
Share your experiences with *how to replace o-ring in delta base faucet youtube* in the comments below! Explore our advanced guide to faucet repair for more in-depth information.
