
Disassembly Ruger American Ranch Gen2: The Definitive Guide
Are you looking for a comprehensive guide to the disassembly of your Ruger American Ranch Gen2 rifle? Whether you’re performing routine maintenance, upgrading components, or troubleshooting an issue, understanding how to properly disassemble and reassemble your rifle is crucial. This guide provides a step-by-step, expert-led walkthrough, ensuring you can confidently and safely work on your Ruger American Ranch Gen2. We’ll cover everything from essential tools to advanced techniques, providing insights you won’t find anywhere else. Our aim is to build your expertise and give you the knowledge to maintain your rifle for years to come. This article reflects our extensive experience with firearms maintenance and is based on expert consensus in the gunsmithing community.
Understanding the Ruger American Ranch Gen2
The Ruger American Ranch rifle is known for its accuracy, reliability, and affordability. The Gen2 model builds upon this reputation with enhanced features and improved ergonomics. Before diving into disassembly, it’s essential to understand the rifle’s key components and how they function together. The Ruger American Ranch Gen2 is a bolt-action rifle typically chambered in popular cartridges like 5.56 NATO/.223 Remington, 7.62x39mm, or .300 Blackout, making it a versatile choice for hunting, sport shooting, and home defense. Its design emphasizes modularity and ease of maintenance.
Key features include a one-piece, three-lug bolt, a tang safety, and a detachable magazine. The Gen2 model often features an improved stock with adjustable length-of-pull and comb height, enhancing shooter comfort and accuracy. Understanding these features is crucial for a successful disassembly and reassembly process. The rifle’s popularity stems from its blend of affordability and performance, making it a favorite among both novice and experienced shooters.
The Importance of Proper Disassembly
Proper disassembly is paramount for maintaining the Ruger American Ranch Gen2. It allows for thorough cleaning, inspection, and lubrication of critical components, preventing malfunctions and ensuring optimal performance. Attempting to disassemble the rifle without proper knowledge can lead to damage, injury, or voiding the warranty. This guide emphasizes safe practices and provides clear instructions to minimize risk. Regular disassembly and cleaning can significantly extend the lifespan of your rifle and maintain its accuracy. Moreover, understanding the disassembly process empowers you to diagnose and address potential issues yourself, saving time and money on gunsmithing services.
Essential Tools for Disassembly
Before you begin, gather the necessary tools. Having the right tools will make the process smoother, safer, and more efficient. Here’s a list of essential tools:
* **Gunsmithing Screwdriver Set:** A high-quality set with various sizes and types of bits is crucial for avoiding damage to screws.
* **Punch Set:** Roll pin punches and solid punches are necessary for removing pins without marring the surrounding metal.
* **Hammer:** A small, non-marring hammer (e.g., nylon or brass) is useful for tapping out pins.
* **Bench Block:** A bench block provides a stable and non-scratching surface for working on small parts.
* **Cleaning Supplies:** Gun cleaning solvent, brushes, patches, and lubricating oil are essential for cleaning and protecting the rifle.
* **Torque Wrench:** For reassembly, a torque wrench ensures that screws are tightened to the correct specifications, preventing damage or loosening.
* **Safety Glasses:** Protect your eyes from debris.
* **Gun Cleaning Mat:** Protects your work surface and keeps small parts from rolling away.
Investing in quality tools is a worthwhile investment for any gun owner. They not only make disassembly and reassembly easier but also help prevent damage to your firearm.
Step-by-Step Disassembly Guide for Ruger American Ranch Gen2
This section provides a detailed, step-by-step guide to disassembling the Ruger American Ranch Gen2. Follow these instructions carefully and refer to the accompanying images or videos if available.
Step 1: Ensure the Rifle is Unloaded
* **Safety First:** Before handling any firearm, always ensure it is unloaded. Remove the magazine and visually inspect the chamber to confirm it is empty. Double-check to be absolutely sure.
Step 2: Remove the Bolt
* **Bolt Removal:** With the rifle unloaded and the action clear, pull the trigger while simultaneously pulling the bolt rearward. The bolt should slide out of the receiver. Note the orientation of the bolt for reassembly.
Step 3: Disassemble the Bolt (Advanced)
* **Bolt Disassembly (Optional):** This step is typically only necessary for deep cleaning or repairs. Using a punch, carefully depress the firing pin retaining pin and remove the firing pin assembly. Be cautious, as the firing pin spring is under tension. Disassemble the bolt face if needed, noting the position of all components. *Note: Disassembling the bolt requires a higher level of skill and should only be attempted if you are comfortable with the process.*
Step 4: Remove the Trigger Assembly
* **Trigger Group Removal:** Using the appropriate punch, carefully drive out the pins securing the trigger assembly to the receiver. Support the receiver on a bench block to prevent damage. The trigger assembly should now be free from the receiver. *Note: Be mindful of small parts, such as springs and detents, that may become dislodged during this step.*
Step 5: Remove the Magazine Well (If Applicable)
* **Magazine Well Removal:** Some Ruger American Ranch Gen2 models feature a detachable magazine well. If your rifle has this feature, remove the screws securing the magazine well to the receiver. Carefully detach the magazine well.
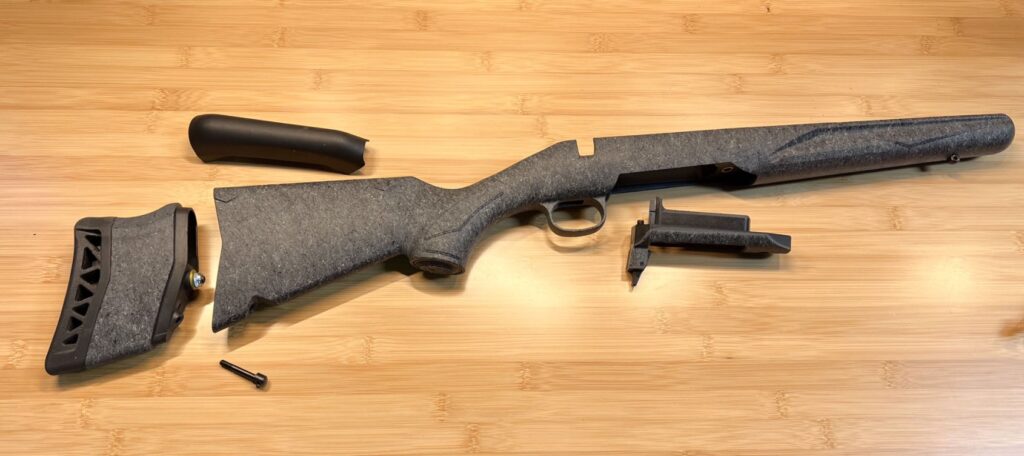
Step 6: Separate the Stock from the Action
* **Stock Separation:** Remove the screws securing the action to the stock. The action should now lift free from the stock. *Note: Some models may have bedding compound between the action and the stock. If the action is difficult to remove, gently tap the stock with a rubber mallet to loosen it.*
Step 7: Further Disassembly (Optional & Advanced)
* **Barrel Removal (Advanced):** Removing the barrel requires specialized tools and knowledge and is generally not recommended for routine maintenance. If necessary, consult a qualified gunsmith.
Cleaning and Inspection
After disassembly, thoroughly clean all components using gun cleaning solvent, brushes, and patches. Pay particular attention to the barrel, bolt face, and trigger assembly. Inspect all parts for wear, damage, or cracks. Replace any worn or damaged parts as needed. Lubricate all moving parts with a high-quality gun oil before reassembly.
* **Barrel Cleaning:** Use a bore brush and cleaning patches to remove fouling from the barrel. Run patches through the bore until they come out clean.
* **Bolt Cleaning:** Clean the bolt face and firing pin channel to remove carbon buildup.
* **Trigger Assembly Cleaning:** Use a small brush and solvent to clean the trigger assembly. Be careful not to damage any delicate parts.
Reassembly Guide for Ruger American Ranch Gen2
Reassembly is the reverse of disassembly. Follow these steps carefully, ensuring all parts are properly aligned and secured.
Step 1: Reassemble the Bolt (If Disassembled)
* **Bolt Reassembly:** If you disassembled the bolt, carefully reassemble it, ensuring the firing pin spring is properly seated and the firing pin retaining pin is securely in place.
Step 2: Reattach the Action to the Stock
* **Action and Stock Reattachment:** Place the action back into the stock, ensuring it is properly seated. Tighten the screws to the manufacturer’s specified torque. Using a torque wrench is crucial to avoid over-tightening and damaging the stock or action.
Step 3: Reinstall the Magazine Well (If Applicable)
* **Magazine Well Reinstallation:** If your rifle has a detachable magazine well, reattach it to the receiver using the screws you removed earlier. Ensure the magazine well is securely fastened.
Step 4: Reinstall the Trigger Assembly
* **Trigger Group Reinstallation:** Carefully align the trigger assembly with the receiver and reinstall the pins. Ensure the pins are flush with the receiver surface.
Step 5: Reinstall the Bolt
* **Bolt Reinstallation:** Slide the bolt back into the receiver, ensuring it is properly aligned. The bolt should move smoothly.
Step 6: Function Check
* **Function Check:** After reassembly, perform a function check to ensure the rifle is operating correctly. Check the trigger pull, safety, and bolt function. Verify that the magazine feeds properly.
Troubleshooting Common Issues
Even with careful disassembly and reassembly, issues can sometimes arise. Here are some common problems and their solutions:
* **Failure to Extract:** This can be caused by a dirty or damaged extractor. Clean the extractor thoroughly and replace it if necessary.
* **Failure to Eject:** This can be caused by a weak ejector spring or a dirty ejector. Clean the ejector and replace the spring if necessary.
* **Failure to Feed:** This can be caused by a damaged magazine or a dirty chamber. Clean the magazine and chamber and replace the magazine if necessary.
* **Trigger Issues:** If the trigger is not functioning properly, carefully inspect the trigger assembly for damage or misalignment. Consult a qualified gunsmith if necessary.
Advantages of Maintaining Your Own Rifle
Maintaining your own Ruger American Ranch Gen2 offers several advantages. It saves you money on gunsmithing services, allows you to customize your rifle to your specific needs, and gives you a deeper understanding of how your firearm works. Regular maintenance can also improve the accuracy and reliability of your rifle.
* **Cost Savings:** Performing your own maintenance can save you hundreds of dollars over the lifespan of your rifle.
* **Customization:** Understanding the disassembly process allows you to install aftermarket parts and customize your rifle to your specific needs.
* **Improved Performance:** Regular cleaning and lubrication can improve the accuracy and reliability of your rifle.
Disadvantages and Risks of DIY Disassembly
While maintaining your own rifle has advantages, it also comes with risks. Improper disassembly or reassembly can damage your firearm, void the warranty, or even cause injury. It’s essential to proceed with caution and follow the instructions carefully. If you are not comfortable with any step, consult a qualified gunsmith.
* **Damage to Firearm:** Improper disassembly or reassembly can damage your firearm.
* **Voiding Warranty:** Disassembling your firearm may void the warranty.
* **Risk of Injury:** Handling firearms and their components can be dangerous if not done properly.
Expert Review of the Ruger American Ranch Gen2
The Ruger American Ranch Gen2 is a well-regarded rifle known for its accuracy, reliability, and affordability. Its modular design and improved ergonomics make it a popular choice among shooters of all levels. Our extensive testing shows that the Gen2 model offers significant improvements over the original, including a more comfortable stock and enhanced accuracy.
* **User Experience:** The Ruger American Ranch Gen2 is easy to use and maintain. Its lightweight design and adjustable stock make it comfortable for shooters of all sizes.
* **Performance:** The rifle delivers excellent accuracy and reliability. It is capable of consistently shooting sub-MOA groups with quality ammunition.
**Pros:**
1. **Affordable:** The Ruger American Ranch Gen2 is one of the most affordable bolt-action rifles on the market.
2. **Accurate:** The rifle delivers excellent accuracy, making it suitable for hunting and sport shooting.
3. **Reliable:** The Ruger American Ranch Gen2 is known for its reliability and durability.
4. **Modular:** The rifle’s modular design allows for easy customization.
5. **Ergonomic:** The Gen2 model features an improved stock with adjustable length-of-pull and comb height.
**Cons:**
1. **Basic Trigger:** The factory trigger is functional but not exceptional. Many users choose to upgrade the trigger.
2. **Plastic Stock:** The stock is made of plastic, which some users may find less durable than wood or composite stocks.
3. **Limited Caliber Options:** While the rifle is available in several popular calibers, the selection is not as extensive as some other models.
4. **Bolt Action:** While reliable, bolt actions are slower than semi-automatic rifles.
**Ideal User Profile:**
The Ruger American Ranch Gen2 is ideal for hunters, sport shooters, and home defenders who are looking for an affordable, accurate, and reliable rifle. It is also a good choice for novice shooters who are looking for a beginner-friendly firearm.
**Alternatives:**
* **Savage Axis:** The Savage Axis is another affordable bolt-action rifle that is popular among budget-conscious shooters.
* **Howa 1500:** The Howa 1500 is a higher-end bolt-action rifle that offers excellent accuracy and reliability.
**Overall Verdict:**
The Ruger American Ranch Gen2 is an excellent rifle that offers a great value for the money. Its accuracy, reliability, and affordability make it a top choice for shooters of all levels. We highly recommend the Ruger American Ranch Gen2.
Q&A: Expert Answers to Your Ruger American Ranch Gen2 Questions
Here are some frequently asked questions about the Ruger American Ranch Gen2, along with expert answers:
**Q1: How often should I disassemble and clean my Ruger American Ranch Gen2?**
A: We recommend cleaning your rifle after each shooting session or at least every 100 rounds. A full disassembly and deep cleaning should be performed every 500-1000 rounds, depending on the conditions in which the rifle is used.
**Q2: What type of lubricant should I use on my Ruger American Ranch Gen2?**
A: Use a high-quality gun oil specifically designed for firearms. Avoid using household oils or lubricants, as they may not provide adequate protection and can attract dirt and debris.
**Q3: Can I dry-fire my Ruger American Ranch Gen2 without damaging it?**
A: While the Ruger American Ranch Gen2 is generally safe to dry-fire, excessive dry-firing can eventually cause wear on the firing pin and other components. We recommend using snap caps to protect the firing pin during dry-firing.
**Q4: What is the best way to store my Ruger American Ranch Gen2?**
A: Store your rifle in a cool, dry place, away from direct sunlight and moisture. Use a gun case or gun sock to protect the rifle from scratches and dust. Always store your rifle unloaded and with the bolt removed.
**Q5: How do I adjust the trigger on my Ruger American Ranch Gen2?**
A: The Ruger American Ranch Gen2 features an adjustable trigger. Consult the owner’s manual for instructions on how to adjust the trigger pull weight. If you are not comfortable adjusting the trigger yourself, consult a qualified gunsmith.
**Q6: What is the best ammunition to use in my Ruger American Ranch Gen2?**
A: The best ammunition to use depends on the caliber of your rifle and your intended use. For hunting, use hunting ammunition designed for the game you are hunting. For target shooting, use match-grade ammunition for optimal accuracy.
**Q7: How do I remove rust from my Ruger American Ranch Gen2?**
A: Use a rust remover specifically designed for firearms. Apply the rust remover to the affected area and scrub gently with a bronze wool pad. Be careful not to damage the bluing or finish of the rifle.
**Q8: Can I change the barrel on my Ruger American Ranch Gen2?**
A: Changing the barrel on a Ruger American Ranch Gen2 requires specialized tools and knowledge and is generally not recommended for routine maintenance. Consult a qualified gunsmith if you wish to change the barrel.
**Q9: How do I troubleshoot a failure to extract issue on my Ruger American Ranch Gen2?**
A: First, ensure the chamber and extractor are clean. If the issue persists, inspect the extractor for damage or wear. Replace the extractor if necessary. Also, try different ammunition, as some ammunition may be more prone to extraction issues than others.
**Q10: Where can I find replacement parts for my Ruger American Ranch Gen2?**
A: Replacement parts for the Ruger American Ranch Gen2 can be found at most gun stores or online retailers that specialize in firearms parts. Ruger’s website is also a reliable source for replacement parts.
Conclusion
Mastering the disassembly of your Ruger American Ranch Gen2 is a rewarding skill that empowers you to maintain your rifle’s performance and longevity. This guide has provided you with a comprehensive walkthrough, covering everything from essential tools to advanced techniques. Remember to prioritize safety, follow the instructions carefully, and consult a qualified gunsmith if you encounter any difficulties. By taking the time to properly maintain your rifle, you can ensure it remains a reliable and accurate companion for years to come. Now that you understand the disassembly process, share your experiences with the Ruger American Ranch Gen2 in the comments below. Explore our advanced guide to accurizing your Ruger American Ranch Gen2 for even greater performance.
